Friday, 30 June 2017

Sending you Joy - Handmade card

Hello everyone
I am back with another Christmas card for you all...following the Christmas in July theme. So this one is a pretty simple card but took me some time as I did a little watercoloring.....
I am putting this card up at the following challenges:
  1. Addicted to Stamps and more Challenge #248 - Holiday
  2. Cute Card Thursday Challenge -#284 - Anything Goes
  3. DLART June Linky Challenge - Anything goes
  4. Inky Chicks Challenge #85 - Christmas 
  5. Word Art Wednesday  Challenge #288-289 - Anything Goes
  6. Simon says stamp Wednesday challenge - Anything goes
I started with a Off white cardstock cut to 41/4"by 5 1/2". On this I did some ink blending using crushed olive distress ink. I dried it with my heat gun and then I did some stamping with Cottage Ivy memento dye ink using leaf like stamp. This stamp is actually from Mudra Christmas decor stamp set and I used the deer stamp and the horn part of it which looks like mistletoe to stamp. 
Then, I turned the cardstock over and did some stamping using music notes stamp from Sheena Douglas Festive stamps -A Little Bit Festive A6 Stamp Set - Christmas Elements Stamp set using Memento Rick Cocoa dye ink. I stamped it repetitively until my entire front was covered. Then I snipped the edge and made it took like it was torn. I trimmed the cardstock  by 1/4" on the vertical side and mounted this on a gold glitter cardstock strip which was just 1"wide and 51/2"long. I then added this panel to a grey A2 size cardbase. I just wrote JOY sentiment using some watercolor pencils. 

Now, was the fun part where I heat embossed and then watercolored the poinsettia like flower which is from Mudra Simply Floral stamp set. I have watercolored using Abandoned Coral and Candied Apple distress ink. I fussy cut it and added it to the card front. Finished my card with beautiful shiny gold sequins from Mudra Stamps and a little Clear Wink of Stella on my flower.

I hope you like my card.
Supplies used :-
  1. Grey 220gsm cardstock
  2. Christmas decor - Mudra Stamps
  3. Sequins- Gold - Mudra stamps
  4. Sheena Douglas Festive stamps -A Little Bit Festive A6 Stamp Set - Christmas Elements Stamp
  5. Off White Cardstock 220gsm
  6. Gold glitter paper- Itsybitsy
  7. Versamark - ItsyBitsy
  8. Ranger Multi medium matte- The craft shop
  9. Wow Heat gun- ItsyBitsy
  10.  Ranger Superfine White Embossing powder - The craft shop
  11. Simply Floral - Mudra Stamps
  12. Distress inks - Abandoned Coral ,Candied Apple and Crushed Olive
  13. Cottage Ivy Memento Dye Ink
  14. Watercolor brush
  15. Black Watercolor Pencil

Thursday, 29 June 2017

Christmas in July - Handmade card.

Hello everyone
Today I have another handmade card for you which is inspired by the thought of " Christmas in July". So I made some Christmas cards which are very simple and easy to do and I have so much fun making them. This is the first of the many cards which are lined up.
I am putting this card up at the following challenges:-
  1. Addicted to Stamps and more Challenge #248 - Holiday
  2. Cute Card Thursday Challenge -#284 - Anything Goes
  3. HLS June 2017 Christmas Challenge - Optional Twist - Tree
  4. DLART June Linky Challenge - Anything goes
  5. Inky Chicks Challenge #85 - Christmas 
  6. Word Art Wednesday  Challenge #288-289 - Anything Goes
  7. Simon says stamp Wednesday challenge - Anything goes
So to make this card, I started with a standard A2 size grey card base. I then heat embossed some pine leaves with Ranger White Super fine heat embossing power on a grey cardstock cut to 41/4" by 51/2". I made my own little christmas tree which was peeking from one of the edges of the card. Then I also heat embossed the sentiment using the same. Thats all I had to do.....Then was the fun part...to decorate the tree with ornaments and I used Mudra sequins to decorate the tree and sprinkled a few here and there.
Then I trimmed my card by 1/8" on all sides and layered it on some gold glitter cardstock. Before the layering, I added red organza ribbon bow tied around the bottom of the card with sequins in the center.
I mounted this to my card base and my card was ready. Simple and quick and so festive....feeling like Christmas in July.

Supplies used :-
1 Grey 220gsm cardstock
2 Christmas decor - Mudra Stamps
3 Sequins- Silver (My Stash) and Gold - Mudra stamps
4 Sheena Douglas Festive stamps -A Little Bit Festive A6 Stamp Set - Christmas Elements Stamp
5 Red Organza Ribbon
6 Gold  glitter paper- Itsybitsy
7 Versamark - ItsyBitsy
8 Ranger Multi medium matte- The craft shop
9 Wow Heat gun- ItsyBitsy
10 Ranger Superfine White Embossing powder - The craft shop

Wednesday, 21 June 2017

Thanks for all you have done.

Hello everyone
Today I have a new card for you all and this one is made for a Doctor..... The patient wanted me to make a colorful card for her doctor just to express how colorful her life is now after he healed her.....so on the inside it says "for all you have done"
I would like to put this card up at the following challenges
  1. Dl.ART - June Linky Challenge - Anything Goes
  2. Simon says stamp - Wednesday challenge- Emboss It
  3. Word Art Wednesday#288 289
  4. Mudra Challenge#10 - Triple Time Stamping
  5. HLS June Anything Goes with Dies Challenge
  6. Cute Card Thursday #482 - pinks
  7. DL.ART Thankful Thursday Challenge#206 - Patriotic/ Thank you card
  8. Scrapyland challenge#68 - Embossing
I used the embossed resist technique for making this card. I white heat embossed all my little roses and leaves which are from the Mudra Wishing You stamp set. then I did a little distress ink blending using Spun sugar, Shaded Lilac, Squeezed Lemonade and Twisted Citron.
I made a triple stamped card by diecutting 3 dies from Sspellbinders Nestabilities Scalloped Labels 1. Then, I also diecut white cardstock using same dies. The then trimmed the diecuts I cut from my front panel so that I could add them on the white mats. The largest one is flat, while the second one has a little dimension to it while the smallest has dimension foam behind it. I layed the entire panel on silver glitter cardstcok and then mounted everything on white standard A2 size cardbase (270gsm).
I added the sentiment on clear vellum with Black Achival ink and cut little banner ends. Finished my card with lots of sequins which are all from Mudra. My client requested a lot of sparkle and sequins and I was more than happy to oblige.......
Supplies used :-
1 Iris White 220gsm cardstock
2 Thanks - Mudra Stamps
3 Distress inks- Spun Sugar Shaded Lilac, Squeezed Lemonade and Twisted Cirton- ItsyBitsy
4 Wishing you - Mudra stamps
5 Sequins- Sugar Plum Mix, Harvest Mix and Clear - Mudra stamps
6 White cardstock- 270gsm - A1 Craft
7 Silver glitter paper- Itsybitsy
8 Black Archival ink- The Craft shop
9 Ranger Multi medium matte- The craft shop
10 Wow Heat gun- ItsyBitsy
11 Ranger Superfine White Embossing powder - The craft shop
12 Versamark - ItsyBitsy
13 Clear Vellum - ItsyBitsy
14 Spellbinders Nestabilities Scalloped Labels One - ItsyBitsy
15 Foam dimension

Saturday, 17 June 2017

Wishing you Safe Travels - See through shaker card.

Hello all  you wonderful people
Today I have a card for you. I have got really addicted to watercoloring technique and am making as many as I can. So this card is again for a special reason....I have a workout friend who is leaving for USA forever and Monday is her last last with us. So this one is for you Upasana.... I have know her only for a month...and got attached to her...you just connect so easily with some people. She was all emotional and so I have used a sentiment very carefully for this card.....I cleverly swapped a Farewell or W'll miss you with a "Wishing you Safe Travels"

The inspiration for this card comes from Tulle Shaker Cards by Jennifer Mcguire and you can know more about this by clicking the link HERE. I really loved the way she used Tulle...but I have used Clear acetate instead. So this my first try at this type of shaker card and it surely is fun.

I am putting this card up at
  1. Dl.ART - June Linky Challenge - Anything Goes
  2. Addicted to stamps and more- Challenge #246 - Anything Goes
  3. Penny Black and more challenges- June- Anything Goes
  4. The Ribbon Girl- June card challenge-Anything goes
  5. Simon says stamp - Wednesday challenge- Emboss It
  6. Word Art Wednesday#287 287
  7. Craft Addition Challenge - challenge #6 - Flowers flowers and yet more flowers
  8. Papericious June challenge- Try something new - This is my first attempt at such see through shaker card
  9. HLS June Watercolor Challenge - optional twist Masking
  10. Paru's Card making Challenge June- Interactive
So more on to my card, I stamped and heat embossed some flowers, buds and leaves on a watercolor cardstock using some Clear embossing powder. I used distress inks to watercolors all my images and once they dried, I fussy cut them out.
 To make this panel, I started with a standard A2 size card base(A) and 1 white cardstock piece cut to A2 size (B). I stacked them and arranged my spellbinders die and ran it thrice through my bigshot. Then, I cut a acetate sheet bigger than my frame and box folded it in half (Basically it helped me to give room for the shaker elements to move freely inside the window  I have just folded the acetate instead of using 2 pieces so there is no tape on the exposed side. Also, I gave it a small 1/8" gap between the 2 folds lining my edges. I hope I am able to convey well. Rest 3 sides are sealed with dimension foam..) I filled my window with some fun sequins, flowers and clear sparkle from Papericious and then sealed it with foam tape on 3 sides. I adhered this shaker window to my A panel carefully so that one no foam tape is visible from any where and the shaker window is correctly lined up on the edge. The frame is rhombus in shape but the shaker panel is square inside.


Then added more foam tape everwhere else and added the B part over it carefully.I added little black splatters on the front panel using black watercolor and then started layering my flowers and leaves. I did stamp my buds with Memento Dye ink by masking off the flowers and buds and quickly watercolored them as well.
Finished my card with the sentiment stamped with Black dye ink on white cardstock and sqeuins.
I hope you all like my card and will try it out.
That finished my card. I have a small shaker video for it and you can watch it to see how fun this is.
Supplies used :-
1 Watercolor cardstock
2 Clear Acetate - ItsyBitsy
3 Distress inks- Picked Raspberry, Shaded Lilac and Wilted Violet for the flowers and bud                                             and Crushed olive and Twisted Cirton for the leaves- ItsyBitsy
4 Simply Floral - Mudra stamps
5 Sequins- Sugar Plum Mix - Mudra stamps
6 White cardstock- 270gsm - A1 Craft
7 Sequins flower
8 Momento Tuxedo Black Dye ink- The Craft shop
9 Ranger Multi medium matte- The craft shop
10 Wow Heat gun- ItsyBitsy
11 Ranger Superfine Clear Embossing powder - The craft shop
12 Versamark - ItsyBitsy
13 Wishing - Mudra stamps
14 Spellbinders Nestabilites Scalloped Labels One - ItsyBitsy
15 Papericious clear Sparkle and white sequins.
16 Camel watercolors

Thursday, 15 June 2017

Wishing you a Speedy Recovery

Hello everyone
I am back today with yet another watercolor card but I have also used watercolor pencils this time. I did do a watercolor card yesterday and I got a lot of positive comments and reactions from a lot of crafters. So it really motivated me to do some more and this is one of the 2 cards I did today.
I am putting this card up at the following blog challenges
  1. Craft Addition Challenge - challenge #6 - Flowers flowers and yet more flowers
  2. Dl.ART - June Linky Challenge - Anything Goes
  3. Addicted to stamps and more- Challenge #246 - Anything Goes
  4. Penny Black and more challenges- June- Anything Goes
  5. The Ribbon Girl- June card challenge-Anything goes
  6. ModSquadChallenge - Make it Square
  7. Simon says stamp - Wednesday challenge- Emboss It
  8. Word Art Wednesday#287 287
I started with heat embossing all the floral images I wanted to use on a watercolor cardstock (I do not have a fancy watercolor paper...just some local made) using Super fine Clear embossing powder from Ranger.
Then, I taped it to a writing pad I have using some washi tape and started watercoloring using distress inks. I used Squeezed Lemonade, Spiced Marmalade, Abondoned coral for the flowers and bud and Crushed olive and Twisted Cirton for the leaves.
I did color some more flowers in shades of purples and I will do another post and tell you more about them there.
Then, did add some depth to my flowers and leaved using some watercolor pencils....again not very fancy...I have old FabelCastle pencils...and I used Red, Orange, Yellow, Light and Dark Greens...Just basic colors. Once everything was air dried, I fussy cut them out.
I started with a 5.5" square card base (White Cardstock 270gsm). I then diecut a frame from a silver glitter cardstock using Spellbinders Nestabilites Scalloped Labels One using the largest die from a 5 1/4" square glitter cardstock. I then adhered this frame to the cardbase using some foam tape to give some dimension.
Then I started adding my flowers, buds and leaves to the card creating some layers. Added few of then with foam dots to create layers.
Thata all, I finishes my card with few sequins from Harvest Mix from Mudra and added my sentiment using some Momento Tuxedo Black ink. The sentiment used is from Mudra stamps Wishing you stamp set.
Supplies used :-
1 Watercolor cardstock
2 Silver Glitter cardstock - ItsyBitsy
3 Distress inks- Squeezed Lemonade, Spiced Marmalade, Abondoned coral for the flowers and bud                               and Crushed olive and Twisted Cirton for the leaves- ItsyBitsy
4 Simply Floral - Mudra stamps
5 Sequins- Harvest Mix - Mudra stamps
6 White cardstock- 270gsm - A1 Craft
7 Watercolor pencils - FaberCastle
8 Momento Tuxedo Black Dye ink- The Craft shop
9 Ranger Multi medium matte- The craft shop
10 Wow Heat gun- ItsyBitsy
11 Ranger Superfine Clear Embossing powder - The craft shop
12 Versamark - ItsyBitsy
13 Wishing - Mudra stamps
14 Spellbinders Nestabilites Scalloped Labels One - ItsyBitsy

Wednesday, 14 June 2017

Sending you sunshine and happiness - Watercolor Card

Hello everyone
I am very excited about this one...I have a watercolor card to share with you. I have never made a watercolor card before...and this is my FIRST ATTEMPT and I hope you guys will be a little lenient with me just for this one time....
So let me show you what I have made...
I have made this card for my husband who is working far away from me on an oilfield rig....I called me up yesterday evening and he sounded very low and in a bad mood...so I thought why not send him some sunshine..... so dear husband this one is for you.. I hope it cheers you up a little.
I started making this card the first thing after I woke up this morning and started digging in my stamp stash and found this very beautiful stamp set from Mudra Stamps...which is a part of their new release.
I am putting this card up at the following challenges -
  1. Addicted to stamps and more- Challenge #246 - Anything Goes
  2. Craft Stamper Magazine- Take it Make it June- Anything Goes
  3. Craft Addition Challenge - challenge #6 - Flowers flowers and yet more flowers
  4. Dl.ART - June Linky Challenge - Anything Goes
  5. HLS - June Watercolor challenge - Optional Twist - Mask
  6. Mudra Challenge#10 - Triple Time stamping
  7. Paru's Card making Challenge June- Interactive
  8. Penny Black and more challenges- June- Anything Goes
  9. The Ribbon Girl- June card challenge-Anything goes
  10. ModSquadChallenge - Make it Square
I started with a 53/4" square watercolor cardstock. I did some clear heat embossing using the beautiful floral stamps from the Simply Floral Stamp set and made my floral frame. The, I started watercoloring all the stamp images using Distress inks.
 I used Picked Raspberry, Abandoned Coral, Worn Lipstick, Spun Sugar,  Crushed Olive, Squeezed Lemonade, Tumbles Glass, Hickory Smoke and Twisted Citron. I did watercolor in layers. I did individual petals and kept adding layers.
It took me 2 hours to do all the watercoloring. After, I was happy with it, I watercolored  the background with Tumbled Glass Distress inks and gave some dimension using Hickory Smoke Distress inks. I stamped my sentiment using Black Archival ink.
Then was the fun part, I created a triple layer card from the watercolored background and made the center part into a shaker window filling it up fun sequins also from Mudra and some are from my stash. I used a grey beige cardstock to created the triple layer card.
 Once, I assembled everything, I added a white 6"cardbase and finished the card with some more sequins on the top.
.
I hope you like my first attempt at watercolor card. Below are the list of supplies I used.

1 Watercolor cardstock
2 Grey Beige cardstock - ItsyBitsy
3 Distress inks- Picked Raspberry, Abandoned Coral, Worn Lipstick, Spun Sugar,  Crushed Olive,                                 Squeezed Lemonade, Tumbles Glass, Hickory Smoke and Twisted Citron- ItsyBitsy
4 Simply Floral - Mudra stamps
5 Sequins- Harvest Mix - Mudra stamps
6 White cardstock- 270gsm - A1 Craft
7 Clear Acetate - ItsyBitsy
8 Black Archival Ink pad- The Craft shop
9 Ranger Multi medium matte- The craft shop
10 Wow Heat gun- ItsyBitsy
11 Ranger Superfine Clear Embossing powder - The craft shop
12 Versamark - ItsyBitsy

Tuesday, 13 June 2017

Twinkle Twinkle Little Star - Mini album/ Scrapbook for Baby Boy

Hello all you beautiful people
Its raining here in Mumbai and the climate is really lazy with all the dark clouds and cool breeze…which make it tough to complete my work…… But it’s a good break from all the summer heat and sweat.  I have a new mini album to share with you guys whose cover is inspired by all the rain and sun….So excited to share this with you all today.


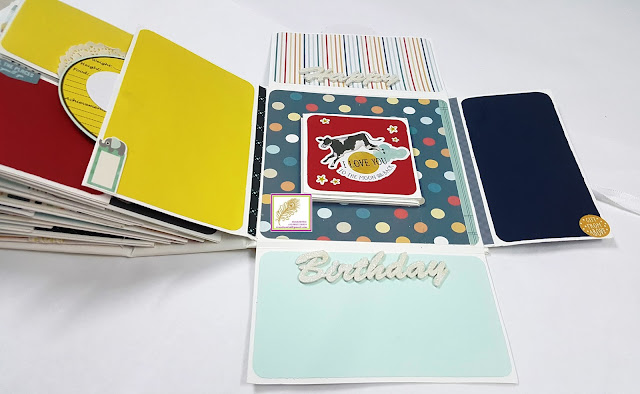
I have a 8” by 8” mini album with 4 ¾” spine with 5 interactive pages (12 sides including inside covers).  This is a 1st year baby album with tons of picture space and 12 onesie tags. I have used Carta Bella Rock- a-Bye baby boy paper pack, chipboard elements and ephemeras and Papericious Color Conception paper pack. The colorful cardstock is from ItsyBitsy. Lot of different elements are used to make this album which are chipboard elements,  clear sparkle powders, ribbons and laces, magnets, brads, doilies, etc. The album is built using 1200gsm chipboard and 220gsm Iris cardstock from A1 craft. I did 12 onesie tags which can also be used as journaling tags to write monthly information. These tags are placed in a separate box


Tons of details and elements are added to make this album and its really difficult to list it all but the Supplies used are from:-

1 The craft shop : Carta Bella pattern papers, ephemeras and chipboard element, Papericious pattern papers, Papericious laces, Distress inks, Papericious clear sparkle

2 Itsybitsy - Silicon glue, chipboard clouds, Ribbons and trims, doilies, Distress inks, Numbers, Colorful cardstock

3 A1 craft- Chipboard, Iris Cardstock, Doilies

4 Jasmine Siddhiqui (Kraftily Konnect)-  Metal charms, mdf words

Without much adieu I am a video walkthough of this project and few pics below here. I hope you all like it.

I am putting this project up at
1 Papericious June challenge - Try something new -  I have a 3D picture cube at the very end of the album...sumthing I did for the first time...so excited about this.
2 Craftsneed - Masculine - I have made a baby boy album
3 Scrap and craft challenge#4 - Add ribbon, twine or sting. - Have used lots of ribbons and twin in                                                       my allbum.
4 Addicted to stamps and more- Photo inspiration - I have taken inspiration from the work Sparkle and Little - and I incorporated in my mini album. I have added some sparkly elements to the cover and tags.
5 Simon says stamp - Monday Challenge- Touchy Feels - i have a lot of textures on my album cover.

1st Month


2nd month


3rd Month


4th Month


5th Month


6th Month


7th Month


8th Month


9th Month


10th Month


11th Month


1 Year


So thats all folk....I am so sorry about such a long post...I hope you all liked my album. Ty for reading this.....Hugs