VREnchanted is an art and craft blog. Here, we share tutorials as well as craft project ideas and I hope you will like them. Some of the projects include scrapbooks, mini albums, handmade cards, gifts boxes, 3D projects, Mixed media layouts, Photo frames and more.....
I am here with my new scrapbook layout. I made this layout for a live demo at the ItsyBitsy store in R city Mall,Mumbai. Everything used to make this layout is from the store and i will like the supplies at the end if you wish you have a look.
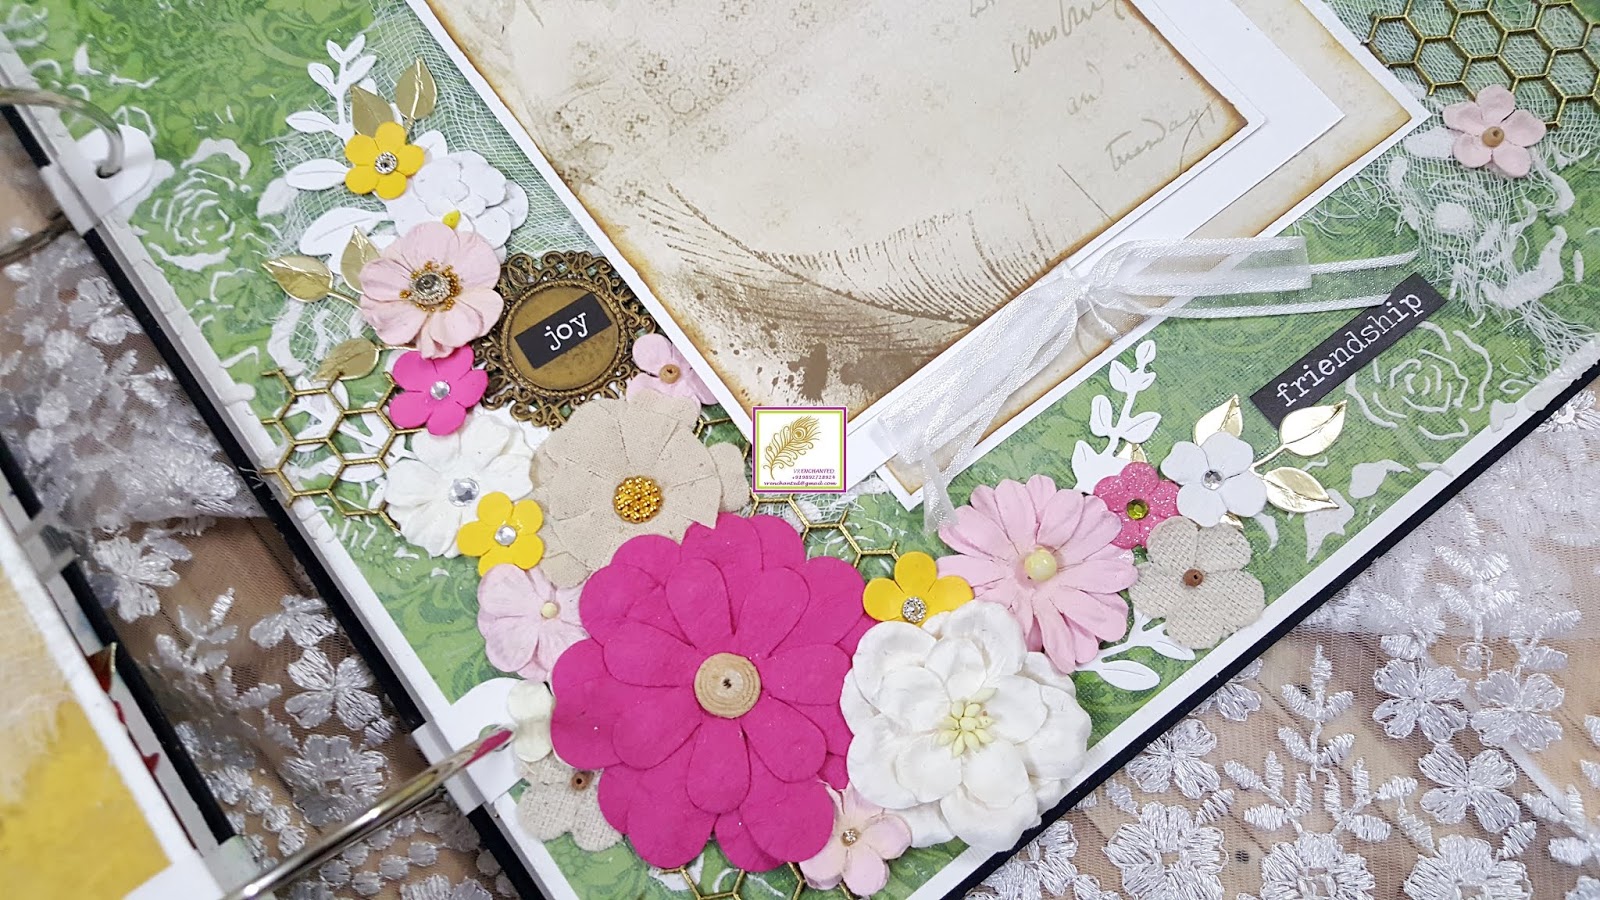
I have used the Aqua Medley collection including the flowers and paper pack for this project. The picture in the center was coordinated with the elements in the collection to give the feel of garden. Along with this, I have used chipboard embellishments, jute twine and cheesecloth to add more texture and interest to the project. Here are some more closeups of this pretty layout.
I hope you all like it. Here is a list of supplies used
Aqua Medley Paper pack - 12"by 12"
Color Splash Spray - Lime Splash and Ocean Mist
2 in 1 modelling paste
Doily Stencil
Soft Gloss Gel
Cheesecloth
White Gesso
White Textured Cardstock - 12"by 12"
Craft Glue
Natural Jute Twine
Chipboard shapes - Rectangular door, Arch Door, Flower with Branch and Whimsy Rectangle frame
Hey guys
Today I have magnetic bookmarks to share with you all. I am the guest Designer at Creative Artiste Challenge Blog today and I have made these as the GDT project. Here is a link to the blog post....do visit me there.
I made 2 of these bookmarks and they were so fun to make....I did use some mixed media techniques to add texture and dimension to this project using mediums and textures from Prima Marketing and Little Birdie Crafts. To add more interest to the background, I have done stamping using Finnabair stamps and some splattering as well. To highlight the texture, I have outlined the stencilled areas and added stitch marks using my Sakura black pen.
To add colors to my project, I have used Lindy's Magical shakers....and used a spray varnish to seal it all in. These bookmarks have magnets ad can clamp on pages...so you never have to loose these bookmarks. I hope you guys like them.
I am putting these up at the following blog challenges:
Hello guys
Today I have really fun mixed media scrapbook for you all.Most you must have seen my mixed media layout which I made a few days back...I guess in June and while I was making it I was thinking to make a mixed media scrapbook and use this as the cover for it......and finally I was able to complete this project. To read more about the cover of this scrapbook , please click HERE. Now lets have a look at this scrapbook.
The entire scrapbook is made using old stash of handmade flowers, embellishments and even pattern papers. I have used Old World Paper stack from DCWV which is an old paper pack for my project and a lot of old and few new flowers from ItsyBitsy(Little Birdie crafts) and mulberry flowers and prima Marketing flowers as well. Apart from all this, clay pieces and metal embellishments, buttons and chipboard pieces from Dusty Attic, Papericious, Mudra crafts and Expression Craft. A lot of stencils from multiple brands were used like Tim Holtz, prima Marketing, Little birdie crafts and The Crafters Workshop.
To hold this massive project, I built a custom sized box which was all white and covered in white lace...I choose white to bring out all the colors used in this project. To keep it simple, I gave the lid of the box an acetate window...so the scrapbook peeping out breaks the monotony of white box. Love the way this has turned out to be....
The scrapbook inside is 12 inch by 12 inch in size and has 7 pages which is all bound using binder rings. Since its a very chunky scrapbook, I have used 65mm binder rings and so the thickness of this project is near about 3.5". I decided to go with cardstock pages instead of chipboard pages to cut down the bulk but to add more durability to the holes I punched for binding, I reinforced with more cardstock. Here is a video walk through of the entire scrapbook....I really encourage you to watch this.
Here are a few page wise pictures of the scrapbook....
I started with maroon and red papers...every page has a lot of mixed media work like stencilling, heat embossing etc. I have used cheesecloth on every page to add more texture apart from using dimensional elements like chipboard shapes, flowers and other embellishments. This page has tones of reds, beige, white, pink, brown and corral tones to bring out the background color.
The next page is in the shades of corals and magenta.....the pages are complimented with the use of brown, pink, red and beige tone embellishments. every page has use of gold foiled leaf diecuts....I used gold heat embossed chipboard shapes as well......it make every page so much interesting and luxurious. Here are some pictures
Now we are in pinks and these 2 pages are in the shades of pinks......and here I have used pinks, whites, brown, corals, purples, lavenders and turquoise colored embellishments. Every page has space to add 3 to 5 pictures of size 5"by 7" in landscape or portrait or even a collage of smaller pictures. These photomats either have magnets or laces as closures to hold them in place.
I hope you are excited to see more....so here we go. The next set of pages are lavender and purple and the embellishments used have pink, white, coral, brown and kraft tones. Along with photomats, every page holds 1 tag which is co ordinated with the colors of the page and has a small ribbon as a putt out. These tags are 4.25"by 4.25"in size and can hold small 4"by 4"pictures or can even be used for journalling.
We have now reached the half way mark, the next set of pages are in the shades of blue. I wanted this album to be happy and cheerful and anyone who opes it should feel a lot of positivity...and in order to do so I decided to add positive quotes on every page. Some also have positive words on the pages....kindness, grateful, love etc and quotes like remember to live today......small 3 to 4 words but with powerful messages.
This set of pages are in the shades of yellow and I decided to make 1 side warm and other side cool and decided to use colors accordingly. A lot of shades of warm colors like reds and oranges are on one side and the other has pinks and lavenders to give it a calming feeling. Love this contrast in colors....hope you like it too.
Onto the next page....these are in shades of yellow ochre and green. Each and every side of the page is a layout on its won and it was like building 17 layouts in total including the cover page. I wanted each page to look different and so I spent a lot of time in planning and designing the layouts and color schemes.I wanted this book to be very vibrant and hap and have used as many colors as I could while not overcrowding the page with many colors. It took me 1 day to make 1 layout and in all I spent 25 days to complete this massive project.
This brings us to the last page....more greens to end the book. Here I have used embellishments in brown, white, yellow, turquoise, green, yellow and lavender tones. In all this book can hold 80 big pictures or many more small pictures and has 16 tags which can hold 32 pictures max or you can even choose to journal on there.
I hope that you all like my scrapbook. The whole idea was to use up as many old stash of flowers and embellishments as I could.....as a crafter we have a lot of unused stuff which is eventually discarded and I decided to use it up this time instead of hoarding it or discarding it. I hope it inspired you all to do the same...Thank you for stopping by.
I am putting this scrapbook up at the following blog challenges:

 I have used the Aqua Medley collection including the flowers and paper pack for this project. The picture in the center was coordinated with the elements in the collection to give the feel of garden. Along with this, I have used chipboard embellishments, jute twine and cheesecloth to add more texture and interest to the project. Here are some more closeups of this pretty layout.


 I hope you all like it. Here is a list of supplies used