Hello everyone
I am so very happy to share this special canvas with you all today. Its my very first mixed media canvas and after months of watching and learning, I never gathered enough courage to make a mixed media canvas until a few days back. I do not know what happened but it just felt like I was ready and it took me 3 days to make this.....


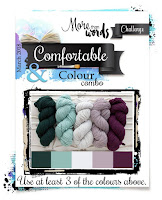
- More Than Words - March 2018 Main Challenge - Comfortable and colour combo - I have used the color scheme and the word Comfortable on my canvas.
- Rhedds Creative spirit - March Challenge
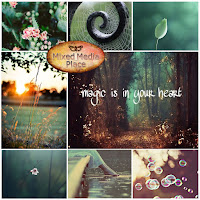
- Mixed Media Place - February Challenge - Textures, teal shades and a new life - Butterfly is the inspiration I took from this moodboard.
I have used a lot of new products launched by Little Birdie crafts and in India it is retailed by Itsybitsy. I have used the newly launched Grainy Texture paste, Crystal Drops, Texture Sand, Soft Gel Mediums - Matt and Gloss and the faithful 2 in 1 Gesso and Modelling paste. Apart from all this, chipboard elements, buttons, bottle caps, burlap sheet, canvas and other embellishments are from the store. To adhere my most of the elements, I have used Monte Marte Gel medium Matt.
Here is the entire process with pictures...so sit back, grab a beverage and I hope you all enjoy.
- I started with a A4 size canvas. I primed the entire surface with White gesso and dried it thoroughly. Then I started to adhere chipboard pieces cut to various sizes. That was my base layer.

- Once, it dried I went ahead and added some more texture using background chipboard elements.

- Then, I started to build my layers and textures using some burlap and kraft tags which I backed up on chipboard. Initially I wanted my design to go from top to bottom so I arranged the pieces as such.

- I then added more chipboard elements - Gears. I added gesso to all the gears before adhering as it has a lot of nooks and carnies I couldn't reach after gluing it to the canvas.

- I came back with more elements like buttons, metal embellishments like name label holders and bottlecaps, resin frames, chipboard locks, keys, butterfly, mdf numbers, buttoms and a Title - DREAM.

- I left this over night to dry and the next morning everything was all dry. I went ahead and added gesso to everything. I added 2 coats on a few pieces but mostly just 1.

- I quickly dried it and then went in again to add more texture using my grainy texture paste, texture sand and crystal drops mixed with microbeads in gel medium. I added this to my canvas in corners and bottle caps and any where I felt more texture was needed. I did not adhere the butterfly and dream to the canvas. I wanted to do that at the end. I added grainy texture paste to that all well. Once it dried, I gave eveything a final coat of Gesso and now my canvas was ready to be painted. If you look closely, you will see more texture in places.

- At this point, thorough drying was necessary or the gesso will start mixing with the colors once we wet the canvas....so I let it dry for 3 to 4 hours to be safe and then started to add colors. The color palette used is Aubergine, Lilac, Turquoise and Teal with White. I used some cheap Camlin acrylic paints and I had only basic colors like red, blue, black and white. I mixed the colors to get the shades I wanted. I added a little water and then filled up spray bottles with my DIY colors.

- I loved what I was seeing and I went ahead and completed the other half with more colors.

- I then, went ahead and highlighted all my textures by dry brushing white gesso. I took a white but I loved when everything came alive.... To add more interest, I highlighted very dimensional pieces by dry brushing White metallic paint...again a cheap one. I also added this to the butterfly and the word dream.

- I added the missing lines from my quote and the canvas was done.


"YOU DONT HAVE TO COMPROMISE YOUR DREAM TO MAKE ANYONE FEEL COMFORTABLE"
Here are some closups of this project.


That's all from me guys, I hope you guys liked my project....Thank you for stopping by and have a nice day ahead.