Hello everyone
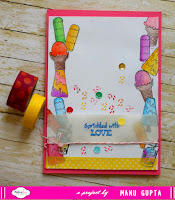
Today I have made a card for Paper smooches May challenge and A Blog Named Hero challenge for this month.The May challenge for Paper Smooches requires us to do a Rainbow themed card while the May challenge for A Blog Named Hero requires us to a Tone on Tone card. So I have clubbed these challenges and done a Rainbow themed tone on tone card.


On a piece of watercolor cardstock, I stamped 4 different flowers from the Fiskars Petals from scratch stamp set with 4 different Distress Inks- Shaded Lilac, Spun Sugar, Peacock Feathers and Squeezed Lemonade. I then went ahead and water colored the flowers using the same distress inks. Now I stamped on the same image using Ranger dye inks in Pink Gumball, Grape soda, Lemon Twist and Peacock feathers distress inks to give them crisp outlines.
I fussy cut all the flowers and curled them a little at ends. I also added colors to the edges so no white is shown. I went ahead and took a 4 . 25" x 5 . 5" white heavyweight cardstock and did a little ink blending on them using Spun sugar, Shaded Lilac and Peacock Feathers. I misted the cardstock with water and let it be for 60 secs. Then I removed the excess with a tissue paper.
I trimmed the card front by 1/4" from all sides and mounted it on the card base which is 4.25" x 5.5" white cardstock (220gsm).On this I added all the cut flowers on their respective colored areas. I then did ink blending on a piece of white cardstock using Squeezed Lemonade Distress Ink. On this I stamped Thanks! sentiment which is from Inkadinkado Expressions And Frames Clear Stamp Set, I cut banner ends and then mounted this sentiment on the card using foam squares such that the sentiment is a bit curved and looks raised. On the sentiment too I added the flowers. I also stamped little circles on the card with the respective colors for a tone on tone stamping effect. If you look closely, it will be seen.
Today I have made a card for Paper smooches May challenge and A Blog Named Hero challenge for this month.The May challenge for Paper Smooches requires us to do a Rainbow themed card while the May challenge for A Blog Named Hero requires us to a Tone on Tone card. So I have clubbed these challenges and done a Rainbow themed tone on tone card.

On a piece of watercolor cardstock, I stamped 4 different flowers from the Fiskars Petals from scratch stamp set with 4 different Distress Inks- Shaded Lilac, Spun Sugar, Peacock Feathers and Squeezed Lemonade. I then went ahead and water colored the flowers using the same distress inks. Now I stamped on the same image using Ranger dye inks in Pink Gumball, Grape soda, Lemon Twist and Peacock feathers distress inks to give them crisp outlines.
I fussy cut all the flowers and curled them a little at ends. I also added colors to the edges so no white is shown. I went ahead and took a 4 . 25" x 5 . 5" white heavyweight cardstock and did a little ink blending on them using Spun sugar, Shaded Lilac and Peacock Feathers. I misted the cardstock with water and let it be for 60 secs. Then I removed the excess with a tissue paper.
I trimmed the card front by 1/4" from all sides and mounted it on the card base which is 4.25" x 5.5" white cardstock (220gsm).On this I added all the cut flowers on their respective colored areas. I then did ink blending on a piece of white cardstock using Squeezed Lemonade Distress Ink. On this I stamped Thanks! sentiment which is from Inkadinkado Expressions And Frames Clear Stamp Set, I cut banner ends and then mounted this sentiment on the card using foam squares such that the sentiment is a bit curved and looks raised. On the sentiment too I added the flowers. I also stamped little circles on the card with the respective colors for a tone on tone stamping effect. If you look closely, it will be seen.


