Hello all you beautiful people
Its heavily raining in Mumbai now and I am snugly sitting home with a cup of hot tea with my laptop at window. I have not been well this week (viral flue...I hate you. What did I ever do to you?) which means I have a few pending projects which are very close to deadline and should have been ready to ship them this week end, but will be shipped next week. I hate it when I cant reach my deadlines because of reasons I cant command over. So I am a bit upset about this and walked into my room and saw all my crafty things( glue, scissors, colorful paper, embellishments, flowers) and immediately got cheered up.


So to cheer myself up more and since we are doing up cycled projects this month on our blog, I decided to my revive my old project which was to make a Kitchen Tissue Paper holder using newspaper. When I conceptualize anything, I just scribble it down in my diary and make notes about supplies and procedure. Then I compare its design with a actual product and work out the design and then make my own version of the same. I did the same with this and I finally decided it was time to make it for real.
So lets begin
Supplies:
- Pva glue( Fevicol)
- Newspaper
- Dovel or crochet needle
- Acrylic Paints
- Varnish
- Scissors/ cutter
- Binder clips
- Gesso ( if you intend to varnish your project)
- Mod Podge or any other decoupage glue
- Tissue napkins or any other paper for decoupage
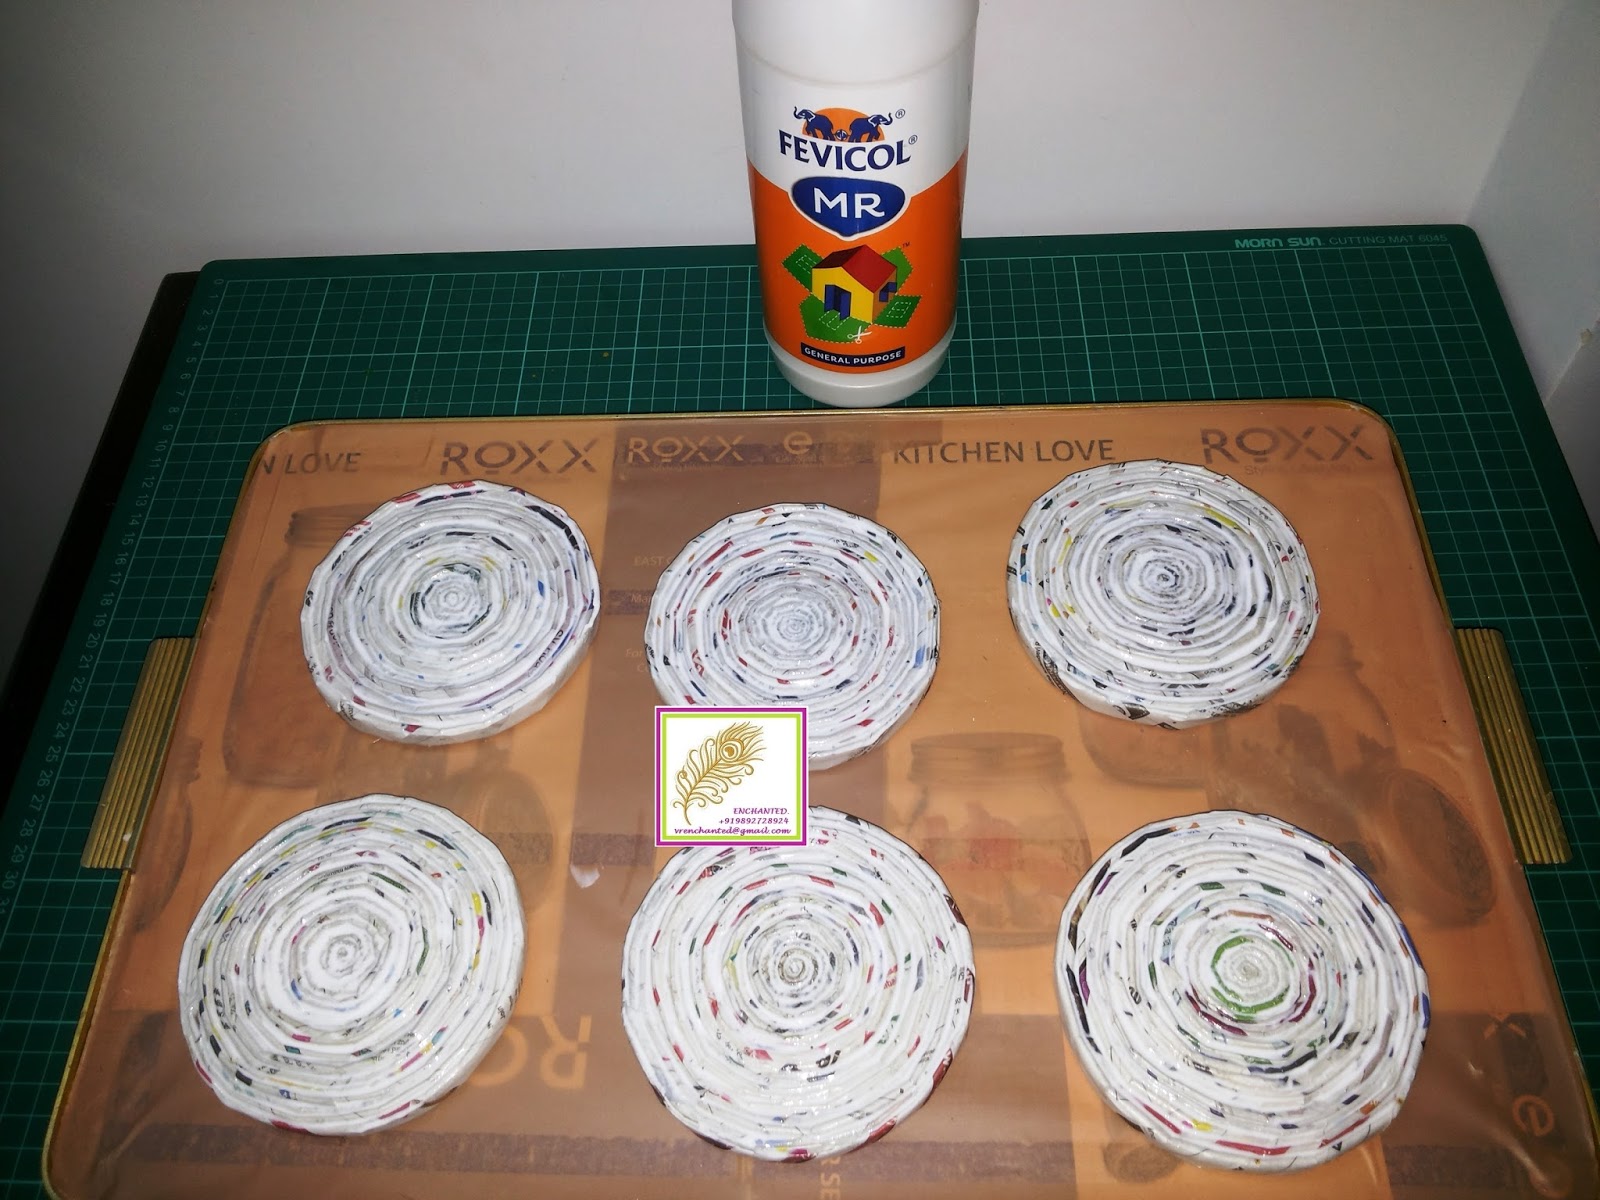
- We need to start by first making newspaper tubes to make the base of the Kitchen Tissue Paper holder. I have used almost 50 tubes of newspaper for this purpose. Plz refer earlier posts to learn how to make newspaper tubes. I make my tubes by dividing a single sheer of newspaper into 3 parts and rolling then using crochet needle. MY tubes re a foot long and 1/4"in diameter.


- To make the central pillar, you need to take the entire newspaper double sheet and roll it in a straight manner to get a uniform straight coil. I rolled the entire newspaper up....so I must have used 6 double sheets and my central pillar is 1"in diameter. Dun't forget to apply glue at the edges of the paper while rolling. This will keep your paper intact.


- Once you finish making your central stick, you can trim it for any unevenness. Check length of your tissue rolls and if your stick is too long, trim it again, You will have to trim it using cutters.


- Once you are ready with your tubes and central stick, we have to coil the tubes to to make a small disc of 3"diameter around the central pillar.

- Once you do that, keep it aside while giving it as good wash of glue and water(1:1 ratio).Make another coiled disc which is 6"in diameter and give it a good glue wash to. Let everything dry properly. Now glue the stick with small disc onto this bigger disc with strong adhesive. that should give us our body.

- Once all the coiling is done at the base, I went ahead and made it a cap so that our tissue wont jump out when we use it.


- To make a cap, I coiled the tissue paper with keep 1"gap in the center to make a circle. You can also make any other shaped cap. Then, I pushed the coils outwards to obtain a something like a bowl. So now it looked like a little cap.

- I didn't paint my tubes at first as I am going to decoupage it. By coiling around the central tube to get small disc and then attaching it to a bigger disc, added to the sturdiness and weight of the holder and it wudn't move around when we use it. Too light and the holder will keep falling down.


- Try to fit your cap on the stick such that it should fit tight and not fall through. If loose, roll some paper around the stick and try adjusting.


- Once all this is done. give all the parts a good coat of glue mixture( 1:2 glue:water). Let it dry thoroughly overnight or 12 hours.

- We have now assembled our kitchen tissue holder and we cant start painting after this or if you want decoupaging. I gave it a coat of Gesso so newspaper print is not seen. Then using Mod Podge Gloss I decoupaged the project using napkins, Applied thin coat of glue , then place the napkin carefully. Let it dry and then applied a thin coat of Mod Podge over it. Then I used acrylic colors in the remaining places where I didn't decoupage. Once done. I gave it another coat of Mod podge.


- I went ahead and added 2 coats of varnish/ sealer to it when I was dried. You can skip this process because Mod Podge itself if a sealer. I however did this because I place my Kitchen holder near the wash basin and I know it will be wet for more time then I want.

- At the end, I tied some bakers twine around the base to add some color to it.


That's all guys. We have our very own Kitchen Tissue Paper Holder. You can even attach it to your wall with strong double side tape. I dun't know, if it will stay....but you can try and see for yourself.
Thank you guys for reading my post and I hope you all liked it. I am all ears to your comments and questions.
Have a great day ahead. Till next time...Keep upcycling.