Thursday, 1 September 2016

Mails - Newspaper Basket

Hello everyone
I have new project for you this week ad it a newspaper basket made specifically to keep your mails. It is made from newspaper tubes using the coiling technique. The best part about making such baskets, you can first figure out what size you want and then start the coiling process. To make this basket, I needed about 60-70 coiled tubes and now this again depends on the size and thickness of your tubes.
This basket it different from the most of the baskets I have done previously because I have used lot of techniques to make. I have colored the basket with acrylic colors and then decoupages on it using flowers cutouts from tissue napkins and mod podge. Another thing, I have incorporated is some glitter or confetti glitter at few places. To add some more dimension, I have outlined the flowers using some white 3d liner and added few 3D stickers of stamps and a beautiful chipboard key. This basket was way out of my comfort zone wrt to colors and bling...but I liked it the way it turned out.
 I started by making 8 circular coiled discs which are about 5" in diameter. I coiled them around a small bottle to get the uniform hole in the center. Then I went ahead and stuck 2 coils together to make a sturdy biscuit like piece. I made two such pieces. These will be used for making the base. The remaining 4 discs will be used for the sides of the baskets. 

Now to make the piece supported by the discs, we need to make 2 small circular coils with diameter 2" and then coil more tubes over it in a square fashion. This will give us the desired shape. Keep coiling until you are happy with the size. Repeat the step for the other side too.
Not to make the rectangular pieces for the other sides, I suggest you make these when you put your coils together. When you do so, you will come to know the size required for the sides and then it will be easy to coil it.


 Once everything is done, put them together and that should give you the basket frame. I added a coat of gesso before I painted it with acrylic colors. I used Fevicryl colors in mauve, purple and magenta and did some shading. Once throughly dried, I decoupaged it with the flowers and while it was wet added some glitter to the project. After, the drying period, I did the outline in white and then gave it a few coats of Asian Paints Aquadur varnish.


Then came the fun part, adding the little stickers and the beautiful key and some glitter alphabets. These were all glued using Epoxy 6000 just to be sure nothing comes apart ever.
I am adding a youtube link for the tour of this basket.
Thats all folks, my basket is ready. I hope you all liked it. Leave me your comments and queries and I will get back to you as soon as I can.

Tuesday, 30 August 2016

Tiaras

Hello everyone
How are you all doing? Its another rainy day with some strong showers in Mumbai today...very cloudy and very dull. Well everything can be fixed with a little craft and so I decided to do a post on tiaras. this was however pending since many days and had to done soon.
So for all of you who sent me meaasges about tiaras....this one is for you.
Flower tiaras are incredibly easy to make and look pretty when adored by almost anyone. You can never go wrong with flowers and a little ribbon. To make tiaras, we dunt need much supplies, however I will give you a little gist of what you might need.

Supplies:

Floral wire
Green tape
Mulberry flowers and buds
Pollens
Mulberry leaves
Satin ribbon or organza ribbon and any other ribbon
Wire cutters and wire pliers

I have listed basic supplies but yet again you can add pearls and little charms and anything else you like. You need not worry if you cant find mulberry paper flowers....use anything you can get your hands on.
We start by first making a circle with the wire and make is so big that it will crown your head. Cut the wire an inch shorter and make little loops at ends. You can even double your wire if you think your wire is too thin. I always double mine or just buy thicker wires. That way, they dunt fold under the weight from the flowers.
Once you do that, start coiling your wire with green tape and simultaneously adding flowers and leaves to the tiaras. I add my pollens to the tiaras by adding them to the wire and covering it with green tape. I add this to the tiaras while I am adding flowers.
Once you do that, you can arrange your flowers as they are wired and are more pliable now. You can add ribons at the ends so the one who adorns it can tie a neat bow at the end.

Incredibly easy to make and very cute when worn. If you need a video tutorial for this, please let me know and I will shoot one for you.Thank you for reading my post and have a great day.

Wednesday, 24 August 2016

The Flora Season Mini Album

Hey Everyone

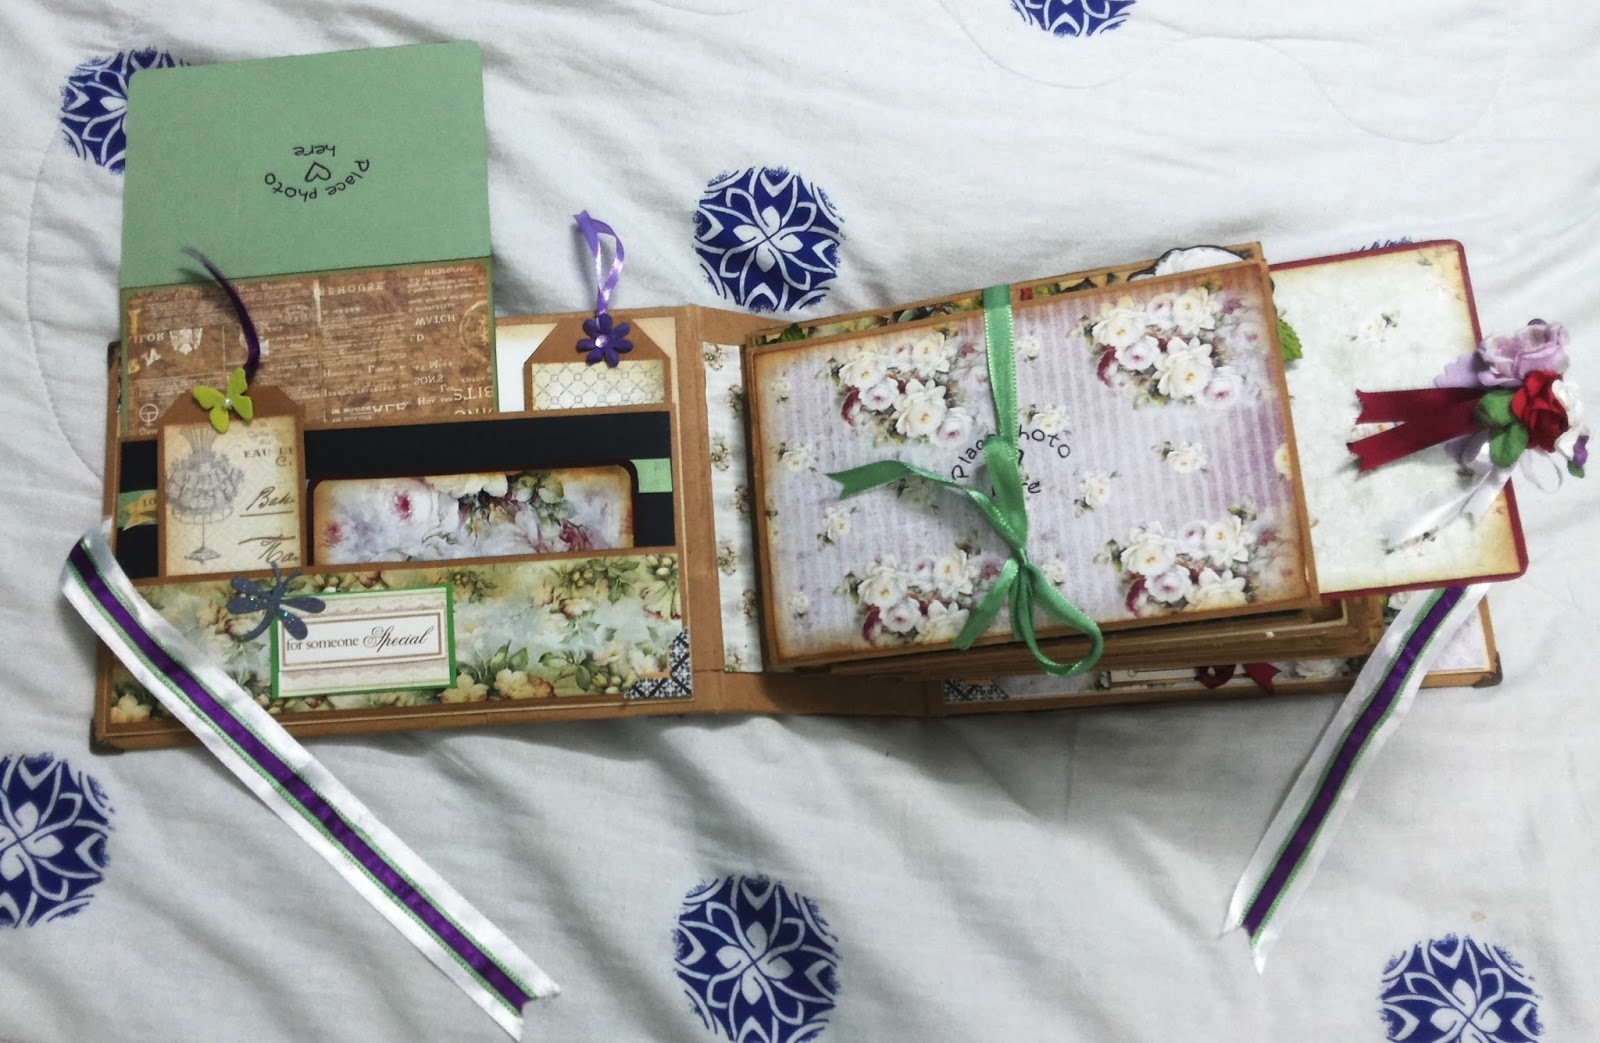
How are you all doing? I hope you all are amazing. Well, today I have a Mini album to share. Considering its size, its wrong to call it mini album as it 10"by 7"in size. and its a horizontal mini album which I have made for a beautiful to- to-bride. This album has lots of floral pattern papers and so I have kept embellishments to a minimal. Though I couldn't control and went a little overboard.
This is going ot be a very picture heavy log post so please grab a cup of drink, sit back and I hope you enjoy this post.
To make this album, I have followed the layout of Safari Album made by Ginger for Thesisterscrapper. I loved the way she did her pages and some of my pages are inspired by her album pages. This album can accommodate 70 to 120 pics of varying sizes depending if you want to put photos even on the decorated photomats and has 30 tags.

This album has 12 pages including the cover but two pages are joined together to make a pocket page, so the actual count of pages is 5. Joining the pages reduced the spine size and also gave me place to put an extra large photomat.  The size of the cover is 6.75"by 9.75" and the spine measures 6.75"by 3.75". This album when done weighs about 3-4 kgs and I knew it would be massive, I have used double chipboard to make the cover. I took 800 gsm chipboard and doubled it to make the covers and the spine pieces. to add to sturdiness, I have binded the cover using tyvek sheets and I am telling you it definitely makes the cover real sturdy. Covered the entire thing with Kraft cardstock I had bought some white ago from Nagashi Srinivas, her cardstock quality is amazing.

I have used gusset binding system and the left a space of 0.6"between 2 pages. You can leave more if you think your album would be more fluffy. and each binding piece is 0.5". I adhered it to the cover using red tacky tape. I have decorated the cover using  papers from The Flora season by Papericious. I used some Trims and ribbons from Itsybitsy for decorations. On the spine, I have added few ribbons and Trims along with few charms I had in my stash. For the cover, the name is made using Itsybitsy chipboard alphabets which I have distressed using Watnut Stain and Old Paper distress inks and covered with glossy accents. The front cover is embellished with 2 heart resin frames from Eno greetings, few flowers I bought in destash from Jasmine Siddique, some flowers were from my stash and few flowers from Itsybitsy. I also added some fussy cut flowers from the paper collection.

Each page is made with 4 12 by 12 sheet of paper as my size is big. I have used 4 dozen papers to complete this projects which includes photomats and tags and very few scraps are left. I have used an entire A4 paper pad of The Flora season and few pages from Eno greetings 12 by 12 pattern paper pack to make some photomats. All the stickers used are from Handmade stickers pack from Eno greetings. The embellishments used inside are mostly form Itsybitsy.

Each page is a flip page and has some pockets inside to hold tags and photomats. On an average each page can hold 10  to 20 pages and 4 tags, 1 pocket page photomat and and few extralarge photo mats on the flip pages. More or less the layout of the pages are same. I have added some photo books, flip books, folding mats and 4 fold mats for pictures. Nothing more to say, I am adding few pics for you to see. I hope you all will like it

Cover page # Page 1
#Page 2 with Flip page, Pocket page, Tags and Photomats.
#Page 3-4 with Flip page, Pocket page, Tags and Photomats.

#Page 5-6 with Flip page, Pocket page, Tags and Photomats.
                        
#Page 7-8 with Flip page, Pocket page, Tags and Photomats.


#Page 9-10 with Flip page, Pocket page, Tags and Photomats.
#Page 11 with Flip page, Pocket page, Tags and Photomats.

Back Cover page # Page 12
I am putting this album up to Papericious challenge of this month which is Anything Goes.

Thank for reading my post. If you like it then leave me a comment. Have a great day ahead.