Showing posts with label butterflies. Show all posts

Tuesday, 8 May 2018

"Memories which last Forever" - Mixed Media Canvas | Tutorial

Hello everyone
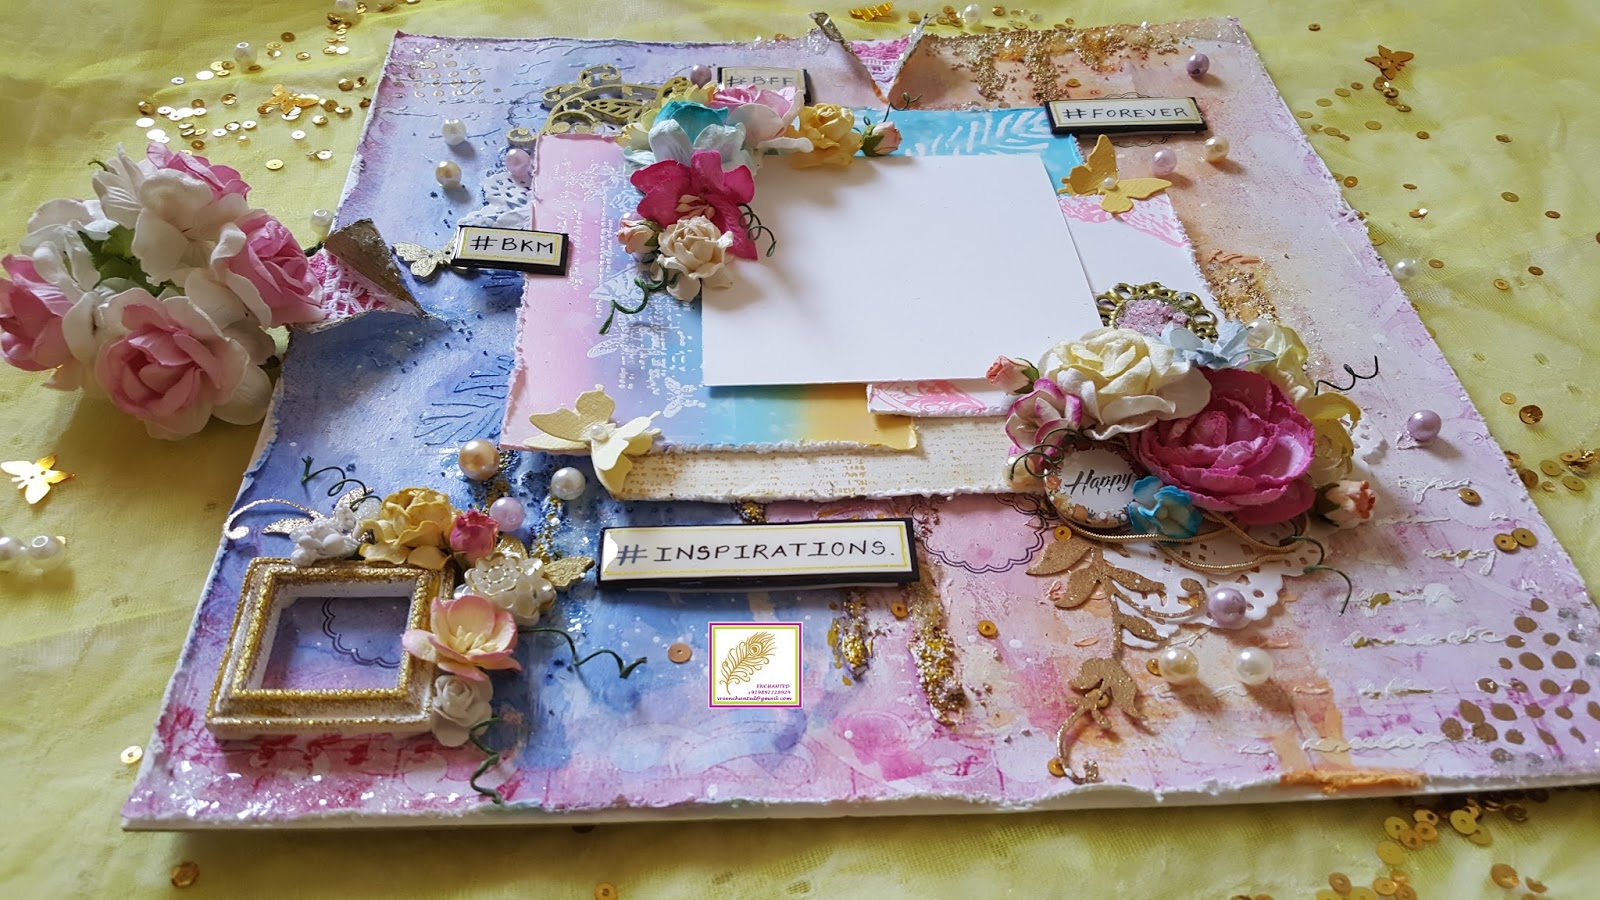
I have a new mixed media canvas for you all today which is inspired by my childhood memories. This canvas is my DT inspiration project for ItsyBitsy and you can visit the blog by clicking HERE. You can see a full list of supplies used along with more pictures there.
As a child, month of May was the time where the schools were shut down and all the books were back in the cupboards. All I did was eat mangoes and play in my garden which was filled with fluttering butterflies and fragrant flowers. So gardens are nostalgia for me..... and I have tried to show that in my canvas.
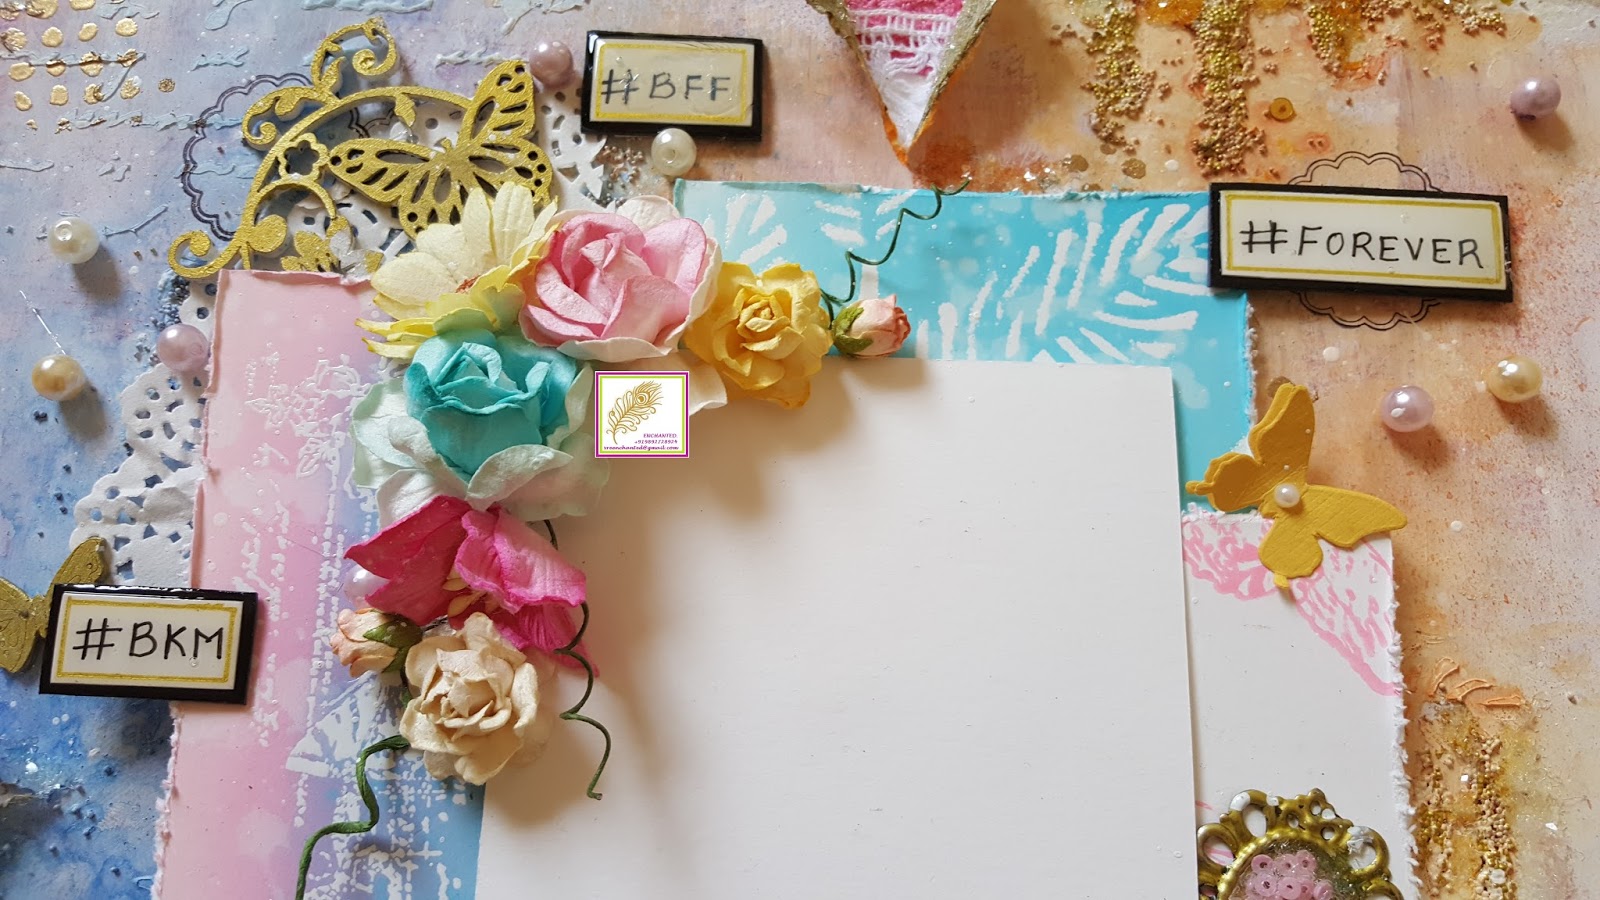
The alphabet background I used to show that books have now taken a backseat and its time to play with butterflies in my garden and so the flowers are the focal elements on my canvas. I have added a lot of gold elements and empty frames to my canvas as gold for me depicts old or vintage.....and thus I tried to represent "Capturing old memories". The color inspiration of yellow and green comes from the King of Fruits - Alphonso Mangoes. So this canvas for me is my childhood memories of May vacation. Here are a few closeups of my canvas.


I have spoken enough....its time for the tutorial. I have a video tutorial for you all from the start to end....which I have sped up a little. I encourage you all to watch it if you want to know how I made this canvas.

I am putting my project up for the following blog challenges:-
  1. More Than words - May Challenge- Memories and Frame. 
  2. More mixed Media Challenge - Anything goes optional Pink
  3. Scrap and Craft - May Challenge - Use 3 chipboards - I have used 1 background chipboard piece, 1 chevron chipboard piece, 2 corner chipboard pieces and a chipboard sentiment.

Tuesday, 24 October 2017

Shaker Window Wind chime/ Baby Mobile/ Balcony decor

Hey guys
Welcome back to my blog...today I have a wind chime/ baby mobile/ balcony decor piece for you which I made a a DT inspiration post for ItsyBitsy blog. I incorporated the fun shaker windows into my project to make it more fun and interesting. I hope you all will like this...I also have a detailed tutorial for this and you can visit me HERE to know more.
here are a few sneak peeks of this project.


Thank you for stopping by...have a fab day ahead.

Monday, 16 October 2017

Snuggle bug - unisex Mini Album with a Box and 12 onesie tags featuring K & Kompany papers.

Hello guys
Happy Diwali to all...I hope you guys are enjoying this Divine Festival of Lights.....May Goddess Laxmi bless you all with wealth and prosperity. 
Today, I have a very special project for you all...This is is my very first Unisex Mini Album. I have made this very bright and colorful album as a custom order using the K & Company Snuggle Bug paper pack. Like all my baby albums, this album is also accompanies with 12 onesie tags and a custom made box to hold everything snugly inside.
The album measures 9" x 9" x 43/4" in size and has 6 very interactive pages. so including the front and back covers, there are 14 sides in this album. Each page is decorated and has many pockets and flipouts...I feel all in all it should hold atleast 120 to 150 pictures in here. I also have give 12 big collage photo mats so you can even add collages....12 collages if added on one side. I have decorated my cover with flowers, butterflies and a shaker window in the center filled with cute sequins, i also have diecuts from Imaginisce to embellish my cover.
The box made to house this chunky album and 12 tags is made from scratch using heavyweight chipboard. This box measures 12" by 15" by 6" and has a partition to hold the tags. Also I added a pocket on the inside of the lid to hold more ephemera and pictures. I have used handmade papers to cover the inside as well as outside of the box and the lid is decorated with colorful polka dots from the scraps of the cardstock. To give it a more finished look, I added satin ribbon tot he box and tied it intoa neat bow....looks like a cool gift box.
The 12 onesie tags are very colorful and made to co ordinate with the paper pack. The numers used are foam numbers and are all glittered. A cute charm and ribbons completes the look. There is journalling space at the back...for every month.
I have a video walkthrough of this album...I encourage you to watch it to see the interactive elements in action. However, I am adding a few pics here also.


That's my album...I hope you guys will like it. Thank you for reading this very long picture heavy post...have a great day ahead.

Friday, 8 September 2017

Daddy's Girl - Baby Announcement Explosion box

Hello guys
I have a new project to share with you all today. In continuation to my explosion box series.....I have yet another explosion box and this one is made using the newly launched Baby Giggles paper pack from ItsyBitsy. This project is my DT inspiration for this month challenge at ItsyBitsy.
I have a small tutorial over there to show you how I made this project with a list of supplies and tons of pictures.....So if you are keen to know...please click the link HERE.

Here is a little sneak peek of my new project...I hope you like this one.


I am adding my project at the following blog challenges:-

  1. Allsorts challenge blog - Week #431 - New Beginnings. - It means a new baby for me.
  2. Double D Challenges - Glitter glitter and Glitter
  3. Scrapping4fun challenge #98 - Techniques - Die Cutting, Dry embossing, Heat Embossing, Box making.
  4. Scrapy Land Challenge #73- Anything Goes- I have used Spellbinders Label 1 dies.

Thank you for reading this post ans have a good day ahead.

Wednesday, 9 August 2017

Amazing Love - Mixed Media layout/ Scrapbook layout- Full Tutorial.

Hello all you wonderful people,

This is Mukta here and today I have for you my first DT project for Itsy Bitsy.......Wohoooo!!...I am surely excited  to be a part of the Itsy Bitsy team and work alongside very talented ladies there. I hope to show you many crafty projects all with different techniques. There are going to be mixed media projects, scrapbooking, altered art and loads more from here onwards.....so stay tuned to the ItsyBitsy blog.
Here is a glimpse of my project
To know more about this layout, supplies, picture and a video tutorial please hop onto the ITSYBITSY blog by clicking HERE.

I am putting this layout up at the following challenges:
  1. CraftAddiction Design Team and Challenge blog - Challenge #07/08 - Summer holiday in mixed media style
  2. Creative Artiste Challenge Blog- Challenge #29- Anything mixed media Goes
  3. Scrapping 4 fun challenge#96- Lace/ Ribbons
  4. Mixed Media & Art - July Challenge - The moodboard has inspired me to incorporate neutral shades and textures along with some butterflies.
  5. Butterfly challenge#84 - Butterfly + Y is You choose and/or W is Wedgewood Blue 
  6. DLART August Linky challenge - Anything Goes

I hope you all liked this. Thank you for visiting me.

Monday, 17 July 2017

Follow your dreams - Shabby chic handmade card

Hello everyone
today I am breaking my watercoloring streak and got back to doing what I love making....shabby chic cards! A big shout out to everyone who loves shabby chic cards... I love shabby chic and cant get enough of them.
I am putting this card up at the following blog challenges:
  1. SimonSaysStamp - Monday challenge - Get in Shape - I have incorporated hexagons and  #d elements
  2. Butterfly challenge#82 - M is matching Pairs and O is color of Orange Peel - I have used 2 same butterflies and orange color.
  3. Craft Addiction design Team Challenge #07 and #08 - Summer in mixed media style - I have made a shabby chic card
  4. Cute card Thursday #486 - Ribbons/ Bows - I have incorporated bow in my card.
  5. DLART July Linky challenge
  6. DLART Thankful thursday #208 - Anything Goes
  7. Scrap and Craft Challenge #5- summertime with butterflies - My card complete summer with flowers, butterflies and honeycombs
  8. Craft Milka - I love math challenge #6 - Hexagons
I started with a white cardstock cut to 4" x 51/4" and I did some distress ink blending with Spiked Marmalade through a honeycomb stencil I just used 1 ink and just varied my pressure to get the gradient effect. I distress ed the edges with a distressing took and then added some neutral hemp twine around the front panel and finished with a cute bow. I mounted this onto a 41/8" x 53/8" orange cardstock which was also distressed on the edges using some fun foam. I mounted this onto my white card base cut to 41/4" by 51/2".

Once everything was assembled, I added some cheesecloth and then assembled all my flowers. Finished off the card with the sentiment and sequins. But then, I thought something was missing and thats when I decided to add butterflies which are white heat embossed and then colored with Spiced Marmalade distress ink. I shaped them and added them on my card and then added glossy accents to few of the honeycombs...super fun when you look up close.

So, that completed my card...I hope you all like it.

Supplies used:
  1. White cardstock (270gsm) - Itsybitsy
  2. Orange cardstock (270gsm) 
  3. Glossy accents
  4. Distress inks - Spiced Marmalade
  5. Mudra stamps- Geometric Nature
  6. Mudra stamps - Sequins - Harvest Mix
  7. Stencil- Honey comb- ItsyBitsy
  8. Ranger heat embossing powder - Superfine White 
  9. Versamark watermark inkpad
  10. Wow Heat gun
  11. Ranger multi medium matte
  12. Tim Holtz distressing tool
  13. Hemp twine - Neutral - ItsyBitsy
  14. Butterfly stamp set - Hampton Art 
  15. Flowers - Personal Stash
  16. Memento Tuxedo Black Dye Ink

Monday, 30 January 2017

Mixed media layout- inspiration.

Hello everyone
I am back with a new project today and it is a mixed media layout....this one is made to celebrate friendship and I really hope it reflects that...... I have a lot of pictures taken and I hope you guys enjoy it. I am also writing down the procedure and supplies used to make this project. I am entering this project at monthly challenge at Papericious blog- Make it 3D, Itsybitsy challenge, Scrapping4fun challenge #83 and Addicted to stamps.
I started with pattern paper from Papericious Wedding paper pack. I distressed it on the edges using a Tim Holtz distressing tool. Brushed the paper with a coat of white gesso. Allowed it to dry completely and then I did some stenciling on the paper using a feather stencil and a script stencil both from Itsybitsy and some texture paste (Home made by me).
Further to add texture I did some heat embossing using Prima Marketting stamps and Gold Tinsel embossing powder from Ranger. I also stamped at a few places with scallop circle stamp using Black archival ink. Used a little micro beads to add some water dripping effects and a little sand grains like texture at a few places.
Once everything was thoroughly dried, I added Color Splash colors from Itsybitsy....I just used Tangerine and Ocean Mist.

I made my own pattern papers for matting the photo....I have used distress inks and few different stamps to make my own papers. I have distressed the edges of all the pieces to give them more dimension.
The bottom most paper is made by stamping script stamp from Prima Marketing on white Iris cardstock using Rich Cocoa Momento dye ink.
The rainbow effect is obtained by ink blending Squeezed lemonade, mermaid lagoon and Spun sugar on white Iris cardstock. I then heat embossing Kaisercraft stamp Botanical using white embossing power from Ranger.
The butterfly stamp from Kaisercraft is stamped on white iris cardstock using Pink Gumball dye ink from Ranger to get the pink butterfly paper.
The uppermost piece of paper is made by stenciling versamark on white iris cardstock and heat embossing with clear embossing powder from Wow. I then ink blended Mermaid lagoon distress ink on the paper.
I arranged all the pieces of paper on top of each other. I added chipboard pieces in between layers to add dimension.
Then comes the fun part.....embellishments and flowers... i have used doilies, mulberry flowers, Mft flourish diecuts, resin frames and flowers, pearls, mdf butterfly diecut, butterflies and much more.....loved this bit and I throughly enjoyed myself.


Happy button is from Papericious, the little metal embellishment is from Eno greetings, laces and trims are from Itsybitsy and so are many little embellishments used.
The four words are hand written on white iris paper and then distressed on the edges with antique linen distress ink. The words are written with waterproof permanent black pen and then given a edge with gold pen. The words are matted on black chipboard pieces and then coated with glossy accents.
To add the final touches, I have used clear Wink of Stella at a few places as well as some some Twinklets Diamond dust
I am adding a little video of the project where you will be able to see it a littermore closely. However due to bad cold and cough, I do not have an audio walkthrough....I hope you all like this and thank you for visiting me. Have a good week ahead....