Showing posts with label baby girl. Show all posts

Monday, 17 June 2019

Hello Baby Girl Mini Album | First Year Baby Record Book | Baby Girl Scrapbook

Hello everyone
Today I have a Baby girl mini album to share with you all today. This cute album was made on commission for a client in London for a new born baby girl and comes with some really fun interactive pages. I have used Hello Baby Girl collection from Echo Park Papers to build my project. I really enjoyed working with this collection...has a lot of subtle prints and colors......rose pink, brown, lavender and lilac, mint and yellow were some of the colors which I was able to play with in this collection.


 The cover of the spine is decorated with some heavenly flowers form ItsyBitsy along with a shaker window in the center which is filled with fun sequins and beads.,,,so fun to play with. I also have done some stenciling on the cover to add a little something extra to the cover.

The album measures 8.5" x  9" with a 4.5" spine and has 6 interactive and cute pages. Since this album was made for a new born, I have given 12 dedicated monthly pages along with ample journalling spots and milestone tags. The spine is kept a little simple to focus all the attention to the cover.


Here is a video tour of this project...I really recommend you watch it to get a better feel of the interactive elements. 
This album will hold 100 plus pictures and if you paste on both sides of the photomats it will hold 125 to 150 pictures in all. Every page has interactive elements and tastefully decorates using stickers and ephemeras. Here are few pictures of the inside pages.....


I really hope you like my album as I surely am very happy with the way it turned out. 

Monday, 24 December 2018

Event Decor Ideas - Baby Arrival

Hello guys
I am here to share a few ideas to decorate your home to welcome your new baby or you can do that for someone else. I enjoyed decorating a clients house...and it hardly took time. I made a bunch of rosettes and butterflies and decorated the entire place...so much fun when its for a baby girl. i get too involved when I get to play with pinks and glitter.
This is the Desset station....and the wall has a big onesie banner along with rosettes and butterflies....so cute isnt it.
I also went nuts decorating the cradle with a glitter crown and more butterflies and hanmade rosettes...loved the pinks at play here.

And here are the doors of the nursery and parents room....simple yet cute....so in love with all this. I hope you all get inspired and make something to brighten up someones baby welcome ceremony.
Thank you for stopping by..have a fun week ahead.

Thursday, 13 December 2018

Baby Girl Mini Album and Keepsake Boxes

Hello guys
I ma so excited to share this mini album and keepsake boxes with you all today. This is made on commission and is flying all the way to Germany to hold the memories of a sweet baby girl.
I am joining the Mini Album Makers Challenge - November 2018 with this project.


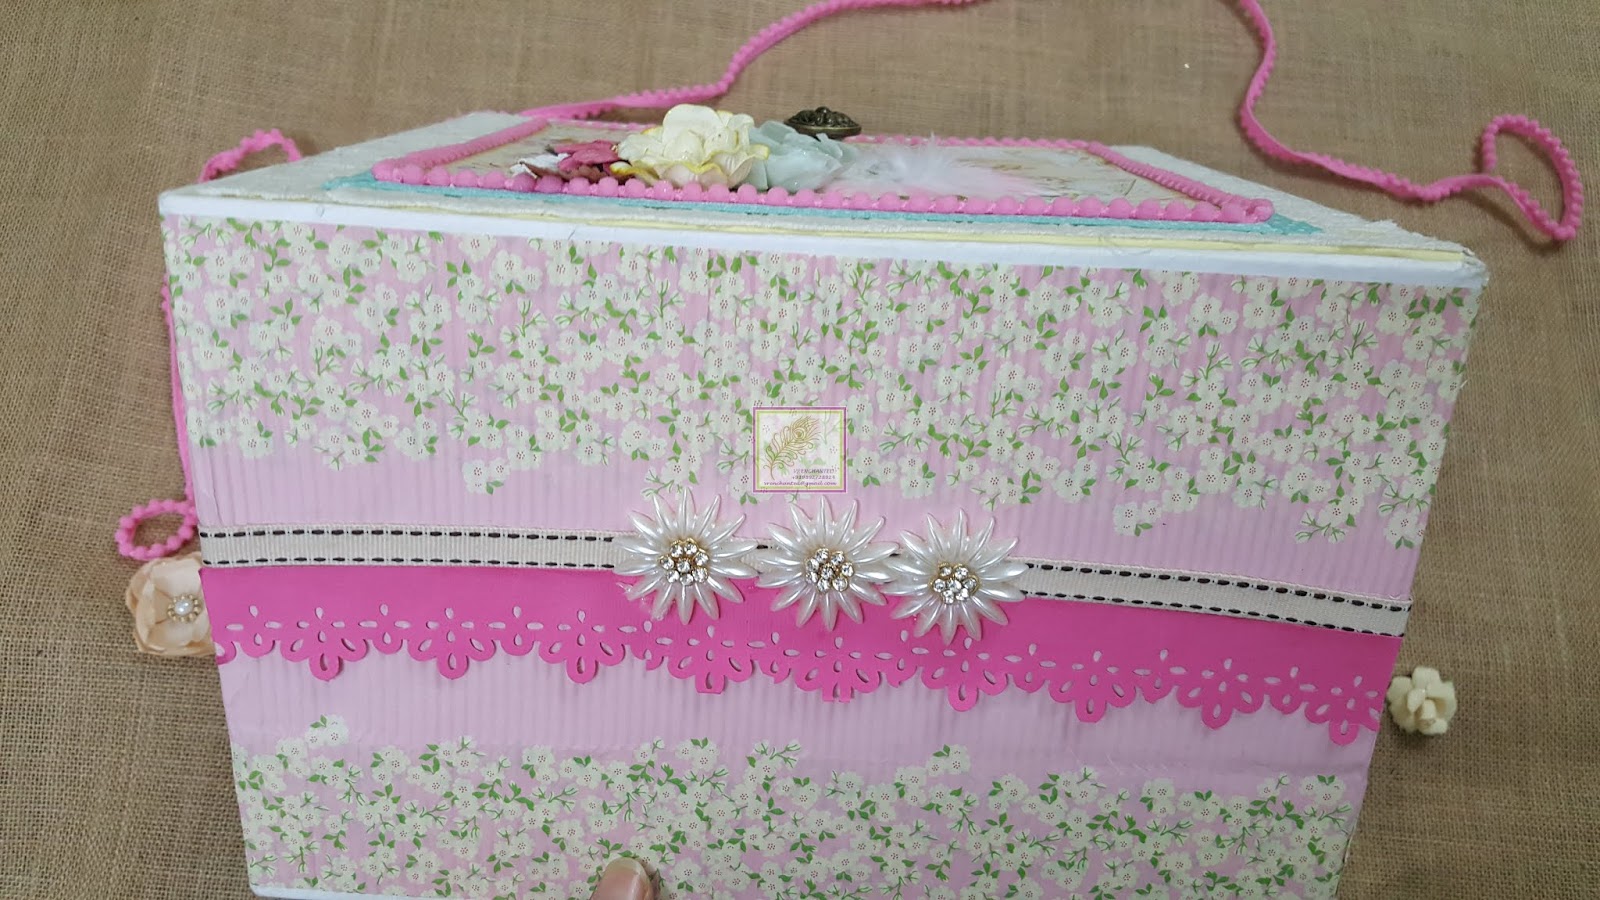
I have a 9"by 9"mini album with 4 1/2"spine which had 6 very interactive pages that can hold 120 plus pictures. Along with this, my client also requested for 4 keepsake boxes which very not very small and so I made 4 boxes which are each 4"by 4"by 4" and can hold booties, mittens, hospital tags, hairlocks and so much more very easily. To house this all, I made a 2 storied box which measures 10.5"by 11.5"by 10.5" in size (l x b x h)


The entire project is made using Prima Marketing Heaven Sent 2 collection - A4 paper pad, 6 by 6 paper pad. 4 x 6 journalling cards, 3 x 4 journalling cards, ephemeras, chipboard stickers, word stickers and flowers all from this collection.


Apart from this, I have used white handmade papers, cardstocks, embellishments, flowers, laces, stickers and more from ItsyBisty craft store.

Had so much fun making this project...I hope you all will enjoy watching the video flip-through of this project.

 Thank you for stopping by..have a fun day ahead.

Monday, 11 September 2017

Baby Girl Birthday Decor Ideas.

Hey guys
Welcome back to my blog. I have a new birthday decor idea for you.....it was a custom order with a particular color theme. Below is the inspiration picture which actually is the cute dress for the Birthday girl.
So, I came up with a banner and a badge for the backdrop and a cute little crown for the little princess keeping the color scheme in my mind. Here are few pictures of the projects
The badge is 16"in diameter and decorated with handmade flowers. I made these flowers without any dies....I drew the petals and fussy cut each layer. Every large flower has 4 large and 3 medium layers and the medium flowers has 4 medium and 3 small layers made using handmade paper from ItsyBitsy. I have colored the flowers using memento dye inks - Dandelion and Tangelo. Further, the centers are dusted with sparkle dots also from ItsyBitsy.

Also there is a chipboard embellishment which is also from ItsyBisty which I have heat embossed with gold and white. The number 1 is made using chipboard by me and covered with white handmade paper. I have used Prima Marketing stencil to decorate  the number. I have used Distress inks - Spiced Marmalade and Fossilized Amber to use over the stencil. The badge is made by layering yellow, gold, white and orange cardstock. A white lace is run around the circumference of the banner. To finish the project, I added few butterflies and leaves and twirls.

The banner that I have made is 8 feet in length and has the girl's name TASHVEE in the center. The banner is also uses the same elements like flowers, butterflies, stencil work and laces like the badge, 
The alphabets are ornate alphabets from ItsyBitsy which I have gold heat embossed twice.
The flourishes are MFT diecuts which I have cut from Gold glitter paper also from ItsyBitsy. I have punched holes and reenforced them with eyelets and passed satin ribbon through to form a banner.

The banners are also layers similar to the badge with orange, white and yellow cardstocks. They measure around 4" is breadth and 5" in height.
Here are some closeups of the banner.

The last project is a cutesie crown for the little princess. The crown is handdrawn and is 16"in circumference and 4"in height. The crown is made using yellow foam and orange cardstock. I have used white satin ribbon for closure and I have sandwiched it between the foam and cardstock. This made sure nothing pokes the baby or causes any discomfort.
Further I dry embossed a white cardstock and layered it on the crown. The finishing touches came from a strip of gold glitter paper at the base and circular diecuts at the 4 apex of the crown. I added a number 1 as the finishing detail. I kept it as simple and as light as I could.
This is how my client decorated the backdrop....Isn't it adorable?
 The list of supplies is given below
  1. Distress inks - Fossilized Amber and Spiced Marmalade - ItsyBitsy
  2. Memento dye inks - Dandelion and Tangelo - The craft shop
  3. Butterflies - ItsyBitsy
  4. Yellow foam sheet - Local store
  5. Cardstocks - Yellow, gold, white and orange- ItsyBitsy
  6. Gold Glitter sheet - ItsyBitsy
  7. MFT die- flourish - Crafters Corner
  8. White handmade paper -ItsyBitsy
  9. Sparkle dots -ItsyBitsy
  10. Embossing folder - ItsyBitsy
  11. White lace -ItsyBitsy
  12. Silicon glue - ItsyBitsy
  13. Aleene's Tacky glue - Crafters corner
  14. Red tacky tape - ItsyBitsy
  15. Satin ribbon - White and yellow -ItsyBitsy
  16. Ornate Alphabets -ItsyBitsy
  17. Wow heat gun- ItsyBitsy
  18. Rangel - Tinsel gold heat embossing powder - Crafters corner
  19. Leaves - Local Store
  20. Chipboard flourish - ItsyBitsy
  21. White heat embossing powder - Wow- ItsyBitsy
  22. Stencil - Prima Marketing.
I am adding this project at the following blog challenges
  1. Double D Challenges - Glitter glitter and Glitter
  2. Scrapping4fun challenge #98 - Techniques - Die Cutting, Dry embossing, Heat Embossing, Stencilling, flower making

Friday, 8 September 2017

Daddy's Girl - Baby Announcement Explosion box

Hello guys
I have a new project to share with you all today. In continuation to my explosion box series.....I have yet another explosion box and this one is made using the newly launched Baby Giggles paper pack from ItsyBitsy. This project is my DT inspiration for this month challenge at ItsyBitsy.
I have a small tutorial over there to show you how I made this project with a list of supplies and tons of pictures.....So if you are keen to know...please click the link HERE.

Here is a little sneak peek of my new project...I hope you like this one.


I am adding my project at the following blog challenges:-

  1. Allsorts challenge blog - Week #431 - New Beginnings. - It means a new baby for me.
  2. Double D Challenges - Glitter glitter and Glitter
  3. Scrapping4fun challenge #98 - Techniques - Die Cutting, Dry embossing, Heat Embossing, Box making.
  4. Scrapy Land Challenge #73- Anything Goes- I have used Spellbinders Label 1 dies.

Thank you for reading this post ans have a good day ahead.

Monday, 3 April 2017

Handmade Baby Boy Mobile using Washcloths

Hey guys
How are you all doing today? Off late most of my projects are for infants and newborns...so to keep the trend going on I made yet another baby mobile using washcloths and well this one is for a baby boy. I had done A mobile a few days back for my niece and you can read it here on my blog Handmade baby girl mobile 


I took a lot of pictures this time and also made a small video which I would like to share with you all. I am putting this project up at monthly challenges at:
1 Addicted to stamps and more -Challenge #235 - I have used butterflies in my project and have taken blues colors as inspiration for this project.

2 Craft Addiction Challenge Blog # Challeneg 04 - butterflies-- I have used Butterflies in my project.


 Supplies:
1 Chipboard 1600gsm
2 White Handmade paper- Itsybitsy
3 Wooded beads - Itsybitsy - Old stash
4 Paper twine (You can also use ribbons, laces, jute ropes....anything you like)
5 Washcloth
6 Satin ribbons
7 Silicon glue
8 Fabric glue
9 Hole Punch
10 Circle cutter
11 2 wooden butterfly buttons - A1 craft
12 small mdf circle cutout - A1 craft
13 silver glitter- Itsybitsy
14 footprint sticker- Itsybitsy

I have made this in such a way that the washcloths can be remove easily from the mobile and it wudn't damage the mobile at all. Here is the video for this project. I hope you all with watch it.