Monday, 12 March 2018

Mixed Media Canvas - Dream

Hello everyone
I am so very happy to share this special canvas with you all today. Its my very first mixed media canvas and after months of watching and learning, I never gathered enough courage to make a mixed media canvas until a few days back. I do not know what happened but it just felt like I was ready and it took me 3 days to make this.....
I was nervous all the time when I was building the layers and I took pictures to capture the entire process. Because this was my first time, I did not dare take a video....but next time I am going to do a video to capture the process. I was unsure about how this will look and whether it will turn out the way I wanted it to......but once I started spraying colors......I was confident and very happy with the end result.
  I have made this for my bestie who has stopped dreaming.....so I want her to look at this and know that "YOU DONT HAVE TO COMPROMISE YOUR DREAM TO MAKE ANYONE FEEL COMFORTABLE" and I strongly believe in this quote......as I always wanted to craft and a lot of people make me feel bad about it....but one day I saw this quote on internet and decided that I will work on my dream even if someone is not comfortable with it......Never looked back since then.
I am putting my project up at the following challenges:
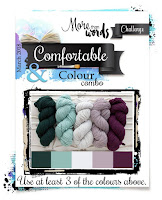
  1. More Than Words - March 2018 Main Challenge - Comfortable and colour combo - I have used the color scheme and the word Comfortable on my canvas.
  2. Rhedds Creative spirit - March Challenge
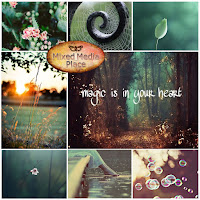
  3. Mixed Media Place - February Challenge - Textures, teal shades and a new life - Butterfly is the inspiration I took from this moodboard.

I have used a lot of new products launched by Little Birdie crafts and in India it is retailed by Itsybitsy. I have used the newly launched Grainy Texture paste, Crystal Drops, Texture Sand, Soft Gel Mediums - Matt and Gloss and the faithful 2 in 1 Gesso and Modelling paste. Apart from all this, chipboard elements, buttons, bottle caps, burlap sheet, canvas and other embellishments are from the store. To adhere my most of the elements, I have used Monte Marte Gel medium Matt.
Here is the entire process with pictures...so sit back, grab a beverage and I hope you all enjoy.

  • I started with a A4 size canvas. I primed the entire surface with White gesso and dried it thoroughly. Then I started to adhere chipboard pieces cut to various sizes. That was my base layer.
  • Once, it dried I went ahead and added some more texture using background chipboard elements.
  • Then, I started to build my layers and textures using some burlap and kraft tags which I backed up on chipboard. Initially I wanted my design to go from top to bottom so I arranged the pieces as such. 
  • I then added more chipboard elements - Gears. I added gesso to all the gears before adhering as it has a lot of nooks and carnies I couldn't reach after gluing it to the canvas.
  • I came back with more elements like buttons, metal embellishments like name label holders and bottlecaps, resin frames, chipboard locks, keys, butterfly, mdf numbers, buttoms and a Title - DREAM.
  • I left this over night to dry and the next morning everything was all dry. I went ahead and added gesso to everything. I added 2 coats on a few pieces but mostly just 1. 
  • I quickly dried it and then went in again to add more texture using my grainy texture paste, texture sand and crystal drops mixed with microbeads in gel medium. I added this to my canvas in corners and bottle caps and any where I felt more texture was needed. I did not adhere the butterfly and dream to the canvas. I wanted to do that at the end. I added grainy texture paste to that all well. Once it dried, I gave eveything a final coat of Gesso and now my canvas was ready to be painted. If you look closely, you will see more texture in places.
  • At this point, thorough drying was necessary or the gesso will start mixing with the colors once we wet the canvas....so I let it dry for 3 to 4 hours to be safe and then started to add colors. The color palette used is Aubergine, Lilac, Turquoise and Teal with White. I used some cheap Camlin acrylic paints and I had only basic colors like red, blue, black and white. I mixed the colors to get the shades I wanted. I added a little water and then filled up spray bottles with my DIY colors.
  • I loved what I was seeing and I went ahead and completed the other half with more colors. 
  • I then, went ahead and highlighted all my textures by dry brushing white gesso. I took a white but I loved when everything came alive.... To add more interest, I highlighted very dimensional pieces by dry brushing White metallic paint...again a cheap one. I also added this to the butterfly  and the word dream. 
  • I added the missing lines from my quote and the canvas was done. 
 "YOU DONT HAVE TO COMPROMISE YOUR DREAM TO MAKE ANYONE FEEL COMFORTABLE"
Here are some closups of this project.


That's all from me guys, I hope you guys liked my project....Thank you for stopping by and have a nice day ahead.

Wednesday, 7 March 2018

Precious Moments - Mixed media Layout | Shabby chic | Scrapbook Layout

Hello everyone
Its been a very exciting week for me......I just conducted my very first workshop where I taught this mixed media scrapbook layout....so so excited to share this with you all. As many of you already know, I am a Design Team member for ItsyBitsy which is India’s no. 1 Hobby, Arts & Craft Store & also the largest manufacturer & Retailer of the finest range of Hobby & Craft supplies in India! ItsyBitsy has many stores throughout the country and it opened its 20th Store in India and 2nd store in Mumbai on 25th Feb,2018 and free craft workshops were conducted to celebrate this occasion. I was so thrilled when I was asked to conduct a workshop for scrapbook layout.......like a dream come true. Apart for scrapbooking, mixed media, card making and decoupage workshops were also conducted for all the craft enthusiasts for free.
I have a tutorial for this layout on the ItsyBitsy blog and if it interests you, please click HERE.


I hope you all liked my layout. I am putting this project up for the following blog challenges :-
  1. Addicted to stamps and more Challenge#282 - Make your Mark- I layout is painted using some color splash sprays and waterbrush to give it a more controlled effect. Also it has splatters to bind everything together.
  2. All sorts challenge blog Week #457 - Ladies only- 
  3. Butterfly Challenge#96 - Spin the wheel with letter N- I have used butterflies, some Napier green leaves and no stamping in my layout
  4. CraftAddiction Challenge - March moodboard- The flowers and colors in the moodboard have resemblance to what I was thinking while making this layout.....blossoms, greens and warm colors....almost like a garden.
  5. More mixed media Challenge - anything Goes optional green
  6. Creative Artiste Challenge Blog #36 - Anything Goes
  7. Creates and Makes challenge #19 - anything goes
  8. Polkadoodles Crafting challenge# Week 9 - anything Goes
  9. The Mixed Media Monthly Challenge #46 - Use a stencil and 3 mediums - I have used Inclined dots stencil from Itsybitsy and mediums - Modelling paste, clear gesso, Soft gel medium gloss and matt, Heavy body gel, color Splash sprays, acrylic colors on leaves and splatters.
  10. WordArtWednesday -week 324-325 - Anything Goes
Image may contain: text
Thank you for stopping by and have a nice day ahead.

Monday, 5 March 2018

The Pregnancy Folio - The journey of Nine Months

hello everyone
Today I have my very first folio to share with you all. I have made this 4 fold folio for my client who is expecting her first child. So her requirement was to journal as well as ad pictures of her journey from 1st to the 9th month. So, I have made it in such a way that a journal, a pen as well as picture mats are accommodated in this Pregnancy Folio.
This folio is made using Pebbles - Garden party paper stack. The paperpack, cardstock, chipboard and the embellishments are from the ItsyBitsy store. The front is decorated with gold heat embossed chipboard embellishments and some cute flowers. The lady in hand painted and in finished with a red heart on the bump. The back had a magnetic pocket to hold the journal. The journal is custom made by me and has 20 pages.
 This folio is 8 1/4" by 6 1/4" by 1 3/4" in size. The folio opens to reveal 2 identical sides which have 3 pockets on either sides to hold photomats of varying sizes. The spine holds a pen on the inside....to make journalling easy.
The left side has a accordion pocket on the inside flap which holds 4 envelopes. These envelopes have 3 mats in each which are ideal to hold some secret messages or pictures.....whatever fancies her. The accordion pocket is held by a brad closure and twine and is adorned with some beautiful quotes. in total this side holds 22 mats in varying sizes.


The right side of the folio holds 5 small pockets which holds 4 photobooklets and 2 small photomats. There 2 pocket pages on the spine which holds 4 photobooklets in all. In total, this sides has 20 photomats.


This folio can hold 40 to 50 pictures and has lot of journalling space. The pockets are deep and can hold more ephemeras, pictures and messages....here is a youtube video showing you a flip of the book.
I am putting my project up for the following blog challenges:-

  1. Allsorts challenge blog Week 457 - Ladies only
  2. Butterfly Challenge #96 - Spin with Letter N - I have used butterfly papers along with some greens and yellows. There is no stamping in my project and all the quotes are printed on my computer. Also, I have used numbers 1, 2, 3 and 9 in my project and the folio is rectangular and not square in shape. Its a shame, I could not accommodate navy somewhere. Hoping this project will be considered.
  3. Mini album makers March Challenge
  4. Creates and Makes Challenge #19 - Anything Goes
Grab the Badge
So thats, the end of my post..... I hope you all will like this project...Thank you for stopping by and have a fun day ahead.

Sunday, 18 February 2018

Memories - Mixed Media Tag/ Shabby Chic

Hello guys
I have a mixed media tag today for you. This is a pink purple color scheme project with loads of flowers and sparkle and splatters. I have lately fallen in love with mixed media projects and cant stop making them....I have personally never done tags and this is my very first mixed media tag...so so happy to share this with you. I have made this as a inspiration for Lets Craft and Create Challenge #134 - Anything Goes = Option Mother's Day. To participate, please click HERE. I hope you all like it as well.

I started with a pattern paper from my stash from Eno Greetings...this paper was lying around for very long. I do not know what pack it belongs to, it has grey and whites stripes with light florish kinda pattern. I adhered it on a chipboard tag measuring 4.5" by 8". I distressed the edges and then added a coat of clear gesso. Once dried, I did some stencilling using Prima Marketing stencil and Modelling paste and left it to dry as well. I then, added Metallique paints from Prima Marketing. To add more interest I did some script stamping using Prima stamps.


I have used diecuts from Kaisercraft Violet crush, some flowers which I heat embossed in white on clear vellum, mulberry lillies and poppies and Handmade flowers from Little Birdie crafts.The sentiment frame is a Kaisercraft diecut as well.
The finishing touches came form White tiny pearls and Dazzle Cocktail glitter mix and splatter of acrylic paints and Gesso.  I also dry brushed all my flowers to bind everything together. My tag has so much shimmer and sparkle but unfortunately my camera failed to capture all the silver sparkle....I am so sad. I wish you all could see it in real.
I am putting up my project at the following blog challenges:-

  1. Words & Paintery February 2018 challenge  - Moodboard.
  2. Butterfly challenge - Spin the wheel with letter P - I have used pinks, purples and hints of peach with pattern papers and tiny pearls.
  3. Crafty Calendar Challenge- 2 or more layers - I have a layered mixed media tag.
  4. Creative Artiste Challenge Blog #35 - Anything Goes
  5. HLS Mixed Media Challenge February- Butterfly


Here is a list of supplies

  • Prima Marketing Stencil - Fading Floral
  • Prima Marketing Finnabair mixed media clear Stamp- Read to Me
  • Prima Marketing Art Alchemy Metallique Paints - Crocus Fields, Vintage Rose, pink Blush
  • Kaisercraft diecuts - Violet Crush
  • Little Birdie Craft- Dazzle Cocktail - Martini
  • Little Birdie Craft - 2 in 1 Modelling paste.
  • Little Birdie Craft - Handmade Printed Flowers Purple
  • Prima Marketing - Clear Gesso 
  • Mulberry flowers - Crafters corner
  • Natural Jute fibre, Tiny Pearls - ItsyBitsy
Thank You for stopping by and have a nice day ahead.