Hey guys
I have a fun canvas to share with you all today which I made this for my niece who is so fond of beaches and actually any waterbodies....but since I did not have her pic...I added a pic of a cute baby girl I took for the internet (Royalty free image). This canvas was so fun to make and I am very happy with they way it has turned out to be.....I wish you all could see this canvas in real...there is so much texture and dimensions and layers to this project..the camera can capture only a fraction of its beauty.


 So, I started by drawing my own starfish on a 12" by 12" sunboard and then I cut it out. To add more strength to it, I traced this same shape on a chipboard and cut it out as well. I adhered the two surfaces together to get a sturdy canvas. This starfish is inspired by a few images of starfishes I saw on the Nat Geo channel...here are a few similar images I found on the internet. I loved the shape of this starfish.....asymmetrical but so beautiful.
 I primed the surface and added a little texture to it using crackle paste. I also stenciled the entire starfish using modelling paste and a dotted stencil....to mimic the body of a starfish. I let it all air dry...the crack are much better in this way but you can always speed it up using a heat gun. Once everything was thoroughly dry, I added a little color to my starfish using Lindy's Magical shaker Gueten Tag Teal in a few areas to highlight the texture. In other places, i used Sandstone chalk paint by Little birdie craft.....to give it a sandy beachy feel. I added a couple of layers and once was happy with it, i dried it all thoroughly.


 Now is my favorite part where I assembled all my embellishments. I started with shells and cheesecloth along with some fine fishnet. To add my picture, I added a lot of scraps to make my base for the picture and then added a lot of twine to frame my pictures.I added a lot of dimension so that my picture stands up against all the embellishments. The, I added chipboard background that looks like scallops and ornate frame in the background to frame my layout which are mebossed in white, gold and pink embossing powders.


 I made my own vine using leaves and flowers and added that to frame my picture and then added more flowers in pinks, blues and beige from Prima Marketing and some are handmade by me. then i filled in the gaps using a mixture of art stones and 3d gel and gesso. Once everything was dry, I added a little pink and blue color to the stones as well to bind it all together. At this point, I added a few more clay corals I made a while back and melange stones in few places which I colored in gold.
I added the cute little starfish and tucked in the small clock amongst the flowers and dried everything thoroughly.


 To add more texture to the canvas, I added mini art stones at few random places and then dry brushed everything with gesso. The finishing touches were a sprinkle of glass glitter an fine gold glitter in few places and the sentiment heat embossed in white. I hope you guys like this canvas as I am totally in love with this. Here is a quick clip to see it much better.
I am putting this up at the following blog challenges:

I have a fun canvas to share with you all today which I made this for my niece who is so fond of beaches and actually any waterbodies....but since I did not have her pic...I added a pic of a cute baby girl I took for the internet (Royalty free image). This canvas was so fun to make and I am very happy with they way it has turned out to be.....I wish you all could see this canvas in real...there is so much texture and dimensions and layers to this project..the camera can capture only a fraction of its beauty.


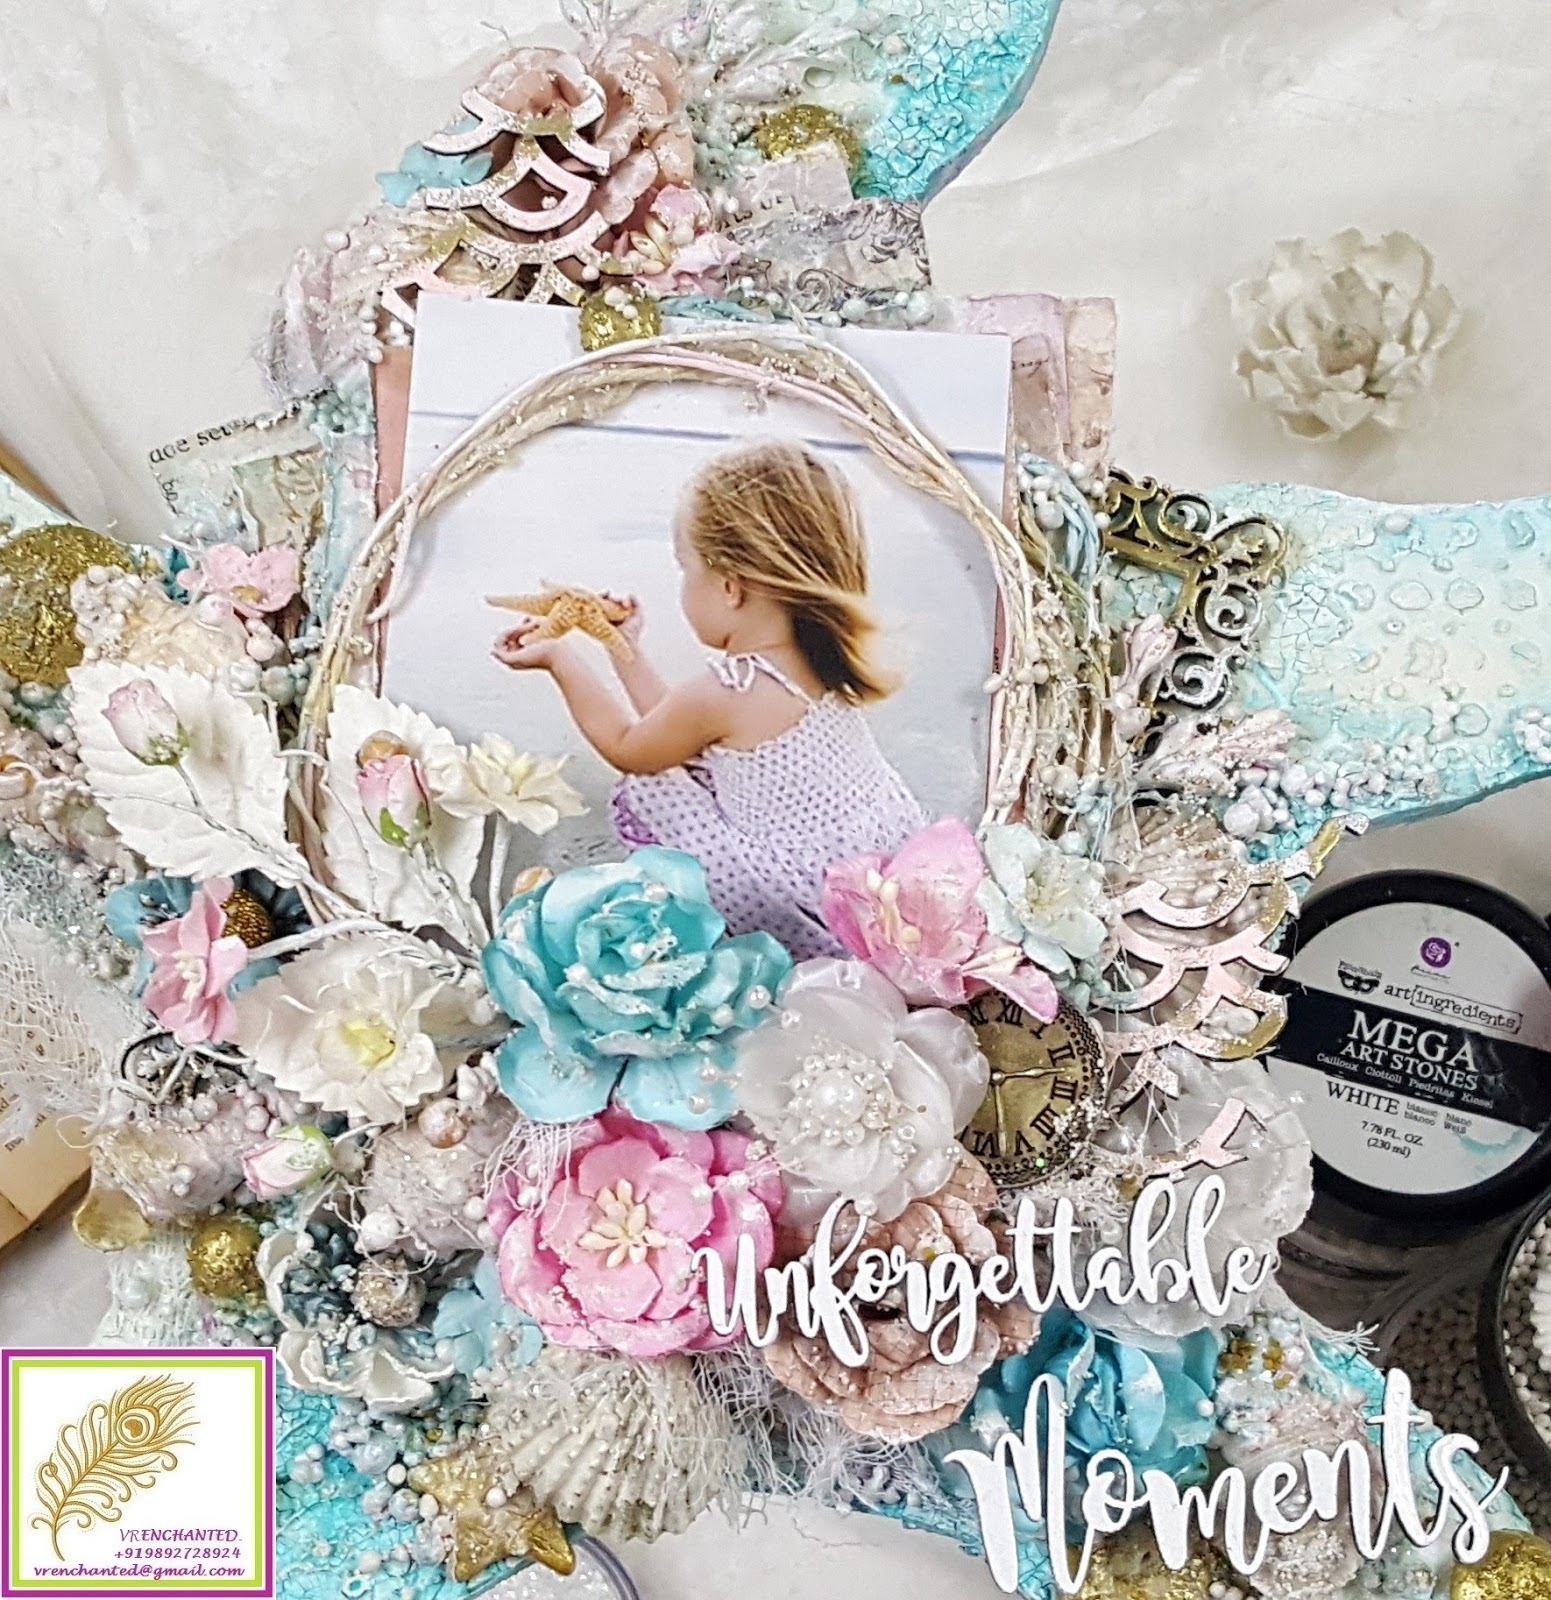


I added the cute little starfish and tucked in the small clock amongst the flowers and dried everything thoroughly.


- Lindy's August Color Challenge - Products used are Magical Shakers - Oom Pah pah , Alpine Ice Rose and Gueten Tag Teal magical shakers
- Creative Artiste Challenge #52 - Anything Goes


