Hello guys
A new day and a new project...I have a simple card to share with you all. I made this card to celebrate my own birthday a few days back.....and so I have used all my fav colors and elements. I love Pinks and Blacks and gold glitter is just my goto fix for everything and I love flowers....so I mixed it all up and came up with this card.

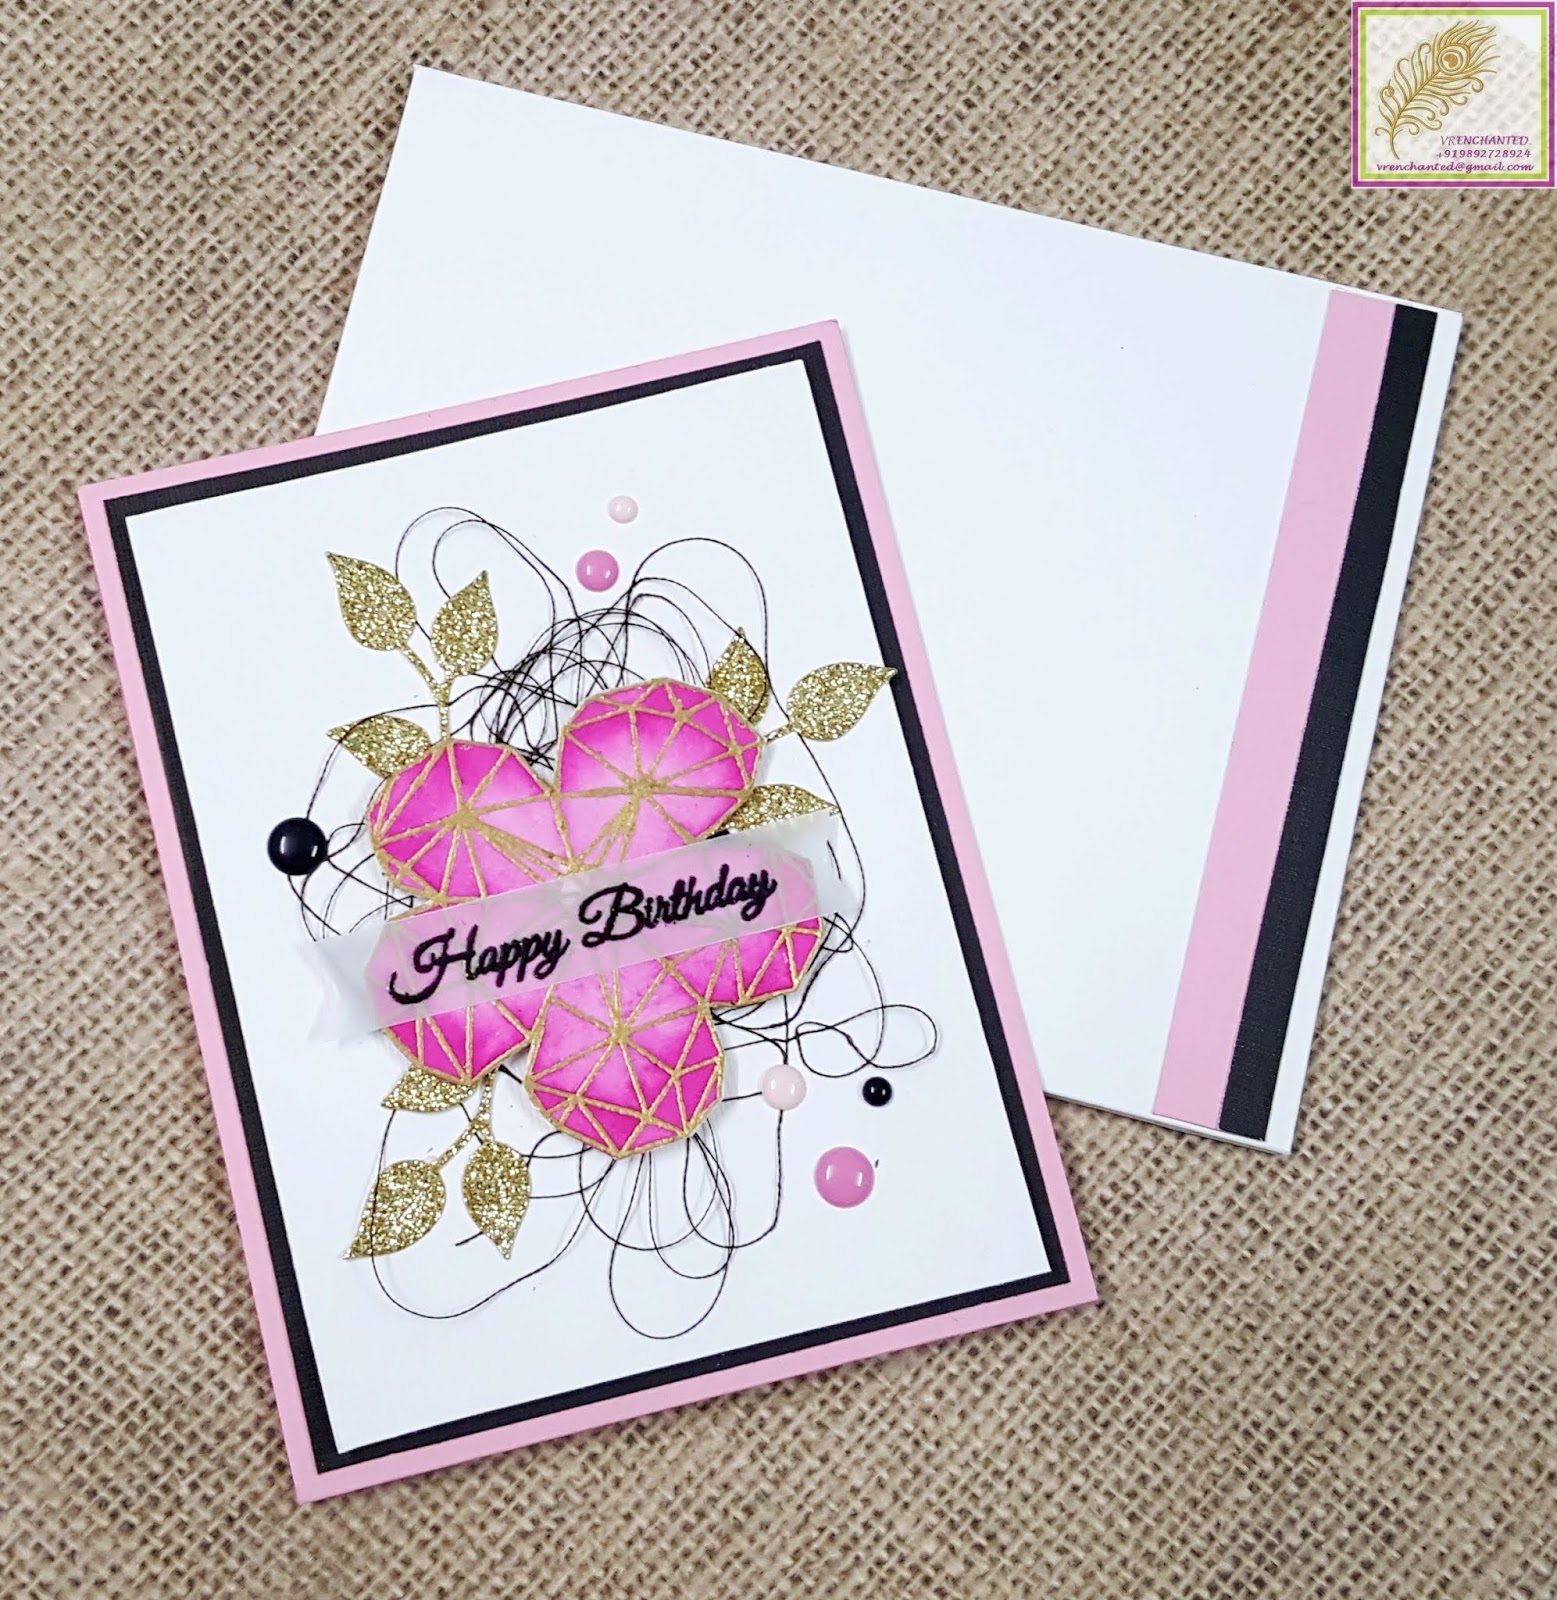
 This is a standard A2 size card and I have used 250gsm Baby Pink cardstock as the base. I layered matted it with Black and White cardstock panels which are 51/4" x 4" and 5" x 3 3/4" respectively. I have added foam tape to mount the white panel to add some dimension to my card.I stamped and gold heat embossed my geometric flower which is from Geometric Nature Stamp set - Mudra Craft Stamps and then watercolored it with ombre shades of pink. Since, there inst a coordinating die I fussy cut the image out....which I feel is just therapeutic. Using Orange curvy leaf die from Elizabeth Craft Designs and gold glitter sheets from IstyBitsy, I diecut some leaves.


To further enhance my card, I added foam dimension to the flower and some black embroidery thread on my card front. I arranged all the elements and finished off with enamel dots in similar colors. The Birthday sentiment is from ItsyBitsy which I gold heat embossed on vellum and adhered onto the flower using Craft Glue from ItsyBitsy.
 I also decorated my envelope using strips of matching cardstock...love it when it all looks like a set.
That's all from me today...thank you for stopping by and I hope you liked my card.
I am putting my card up at the following challenges:


A new day and a new project...I have a simple card to share with you all. I made this card to celebrate my own birthday a few days back.....and so I have used all my fav colors and elements. I love Pinks and Blacks and gold glitter is just my goto fix for everything and I love flowers....so I mixed it all up and came up with this card.


To further enhance my card, I added foam dimension to the flower and some black embroidery thread on my card front. I arranged all the elements and finished off with enamel dots in similar colors. The Birthday sentiment is from ItsyBitsy which I gold heat embossed on vellum and adhered onto the flower using Craft Glue from ItsyBitsy.

That's all from me today...thank you for stopping by and I hope you liked my card.
I am putting my card up at the following challenges:
- HLS October Watercolor Challenge - Anything Goes : Optional Twist Gold
- The Flower Challenge #25 - Sparkle
- Craft stamper magazine - Take It Make It October - Anything Goes
- HLS October CAS Challenge - Vellum.
- Creative With Stamps - Halloween or Leaves
- HLS October Anything Goes with Dies Challenge - I have included leaf diecuts on my card


