VREnchanted is an art and craft blog. Here, we share tutorials as well as craft project ideas and I hope you will like them. Some of the projects include scrapbooks, mini albums, handmade cards, gifts boxes, 3D projects, Mixed media layouts, Photo frames and more.....
Showing posts with label fiskars stamp set. Show all posts
Showing posts with label fiskars stamp set. Show all posts
Hello everyone
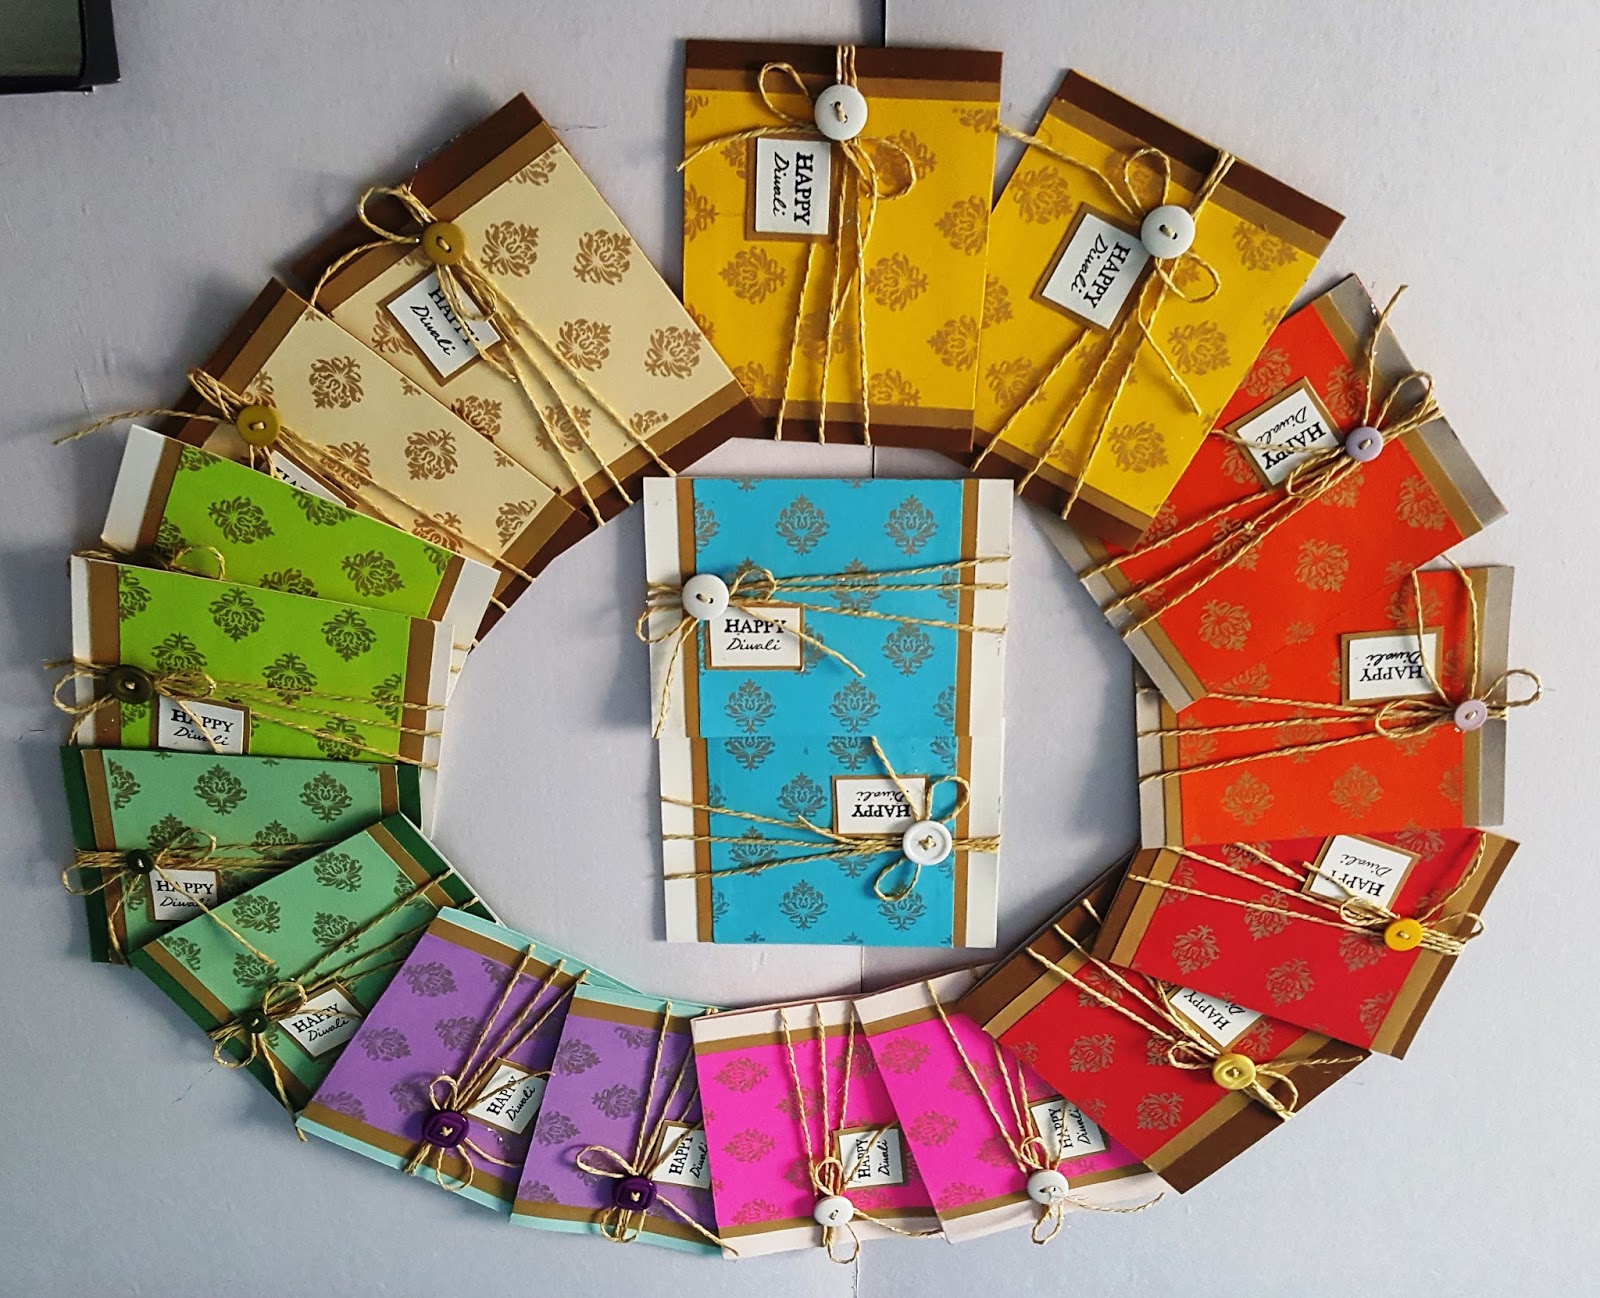
I am posting today some handmade Diwali cards which are very clean and simple with minimum embellishments. I have made this for Cards for a Cause-India where Neha Gala who owns A1 Craft shop in Andheri East, Mumbai is doing a drive for collecting cards for our soldiers on the borders. I really like her store and she had most of the things you need for crafting.
What she is is doing is collecting cards from willing people and send it to Leh, Hall of Fame and I feel she is doing an amazing job. I feel we should all support this cause and add as many cards as we can to this.Its a wonderful gesture and I wanted to participate in this. So made a few encouragement cards and Diwali cards myself.
Since, using embellishments was required to be minimum and glitter or sequins was not advised, I used buttons in my cards with some paper twine in my cards. I started with standard A2 size card and used pattern paper which has gold motifs on them. Layered this pattern paper on some gold cardstock and mounted them on my card base. To add some decoration, I wound some paper twine and finished with a button and a bow.
On the inside, the cards is pretty simple. I added a strip of pattern paper on the side to bring in some color. For dark cardbases, I have added white cardstocks on the inside to enable the use of any inks available with our jawans.
The envelopes are simple ones made with the same color as the card base and and matching pattern paper. The happy diwali stamp is actually a combined stamp. Diwali is from Peek-a-boo stamp and Happy is from Fiskars petals from Scratch stamp set. The stamping is done using Black Archival ink so its permanent and waterproof.
That's all from me.....and I hope all of you can add some cards from your side. Those of you who do not have a stamp or inks.....don't hold back. Use waterproof pens to write messages and sentiments....use anything you have to make cards. We should appreciate our soldiers who are fighting for us on the border...and these little encouragement notes and cards will mean a lot to them.
Thank you all for reading my post and have a great day.
Supplies:
Cardstock- ItsyBitsy
Buttons- Itsy bitsy and A1 craft
Paper twine - Anupam Super store
Pattern Paper - Anupam super store
Stamps - Peek--boo and Fiskars
Ink- Archival Black ink
Silicon Glue - Itsybitsy
I am adding this card to this month's challenge at Ranganjali.
Hello everyone
How are you all doing? I hope you all are enjoying the festivities going on in India....Ganeshotsav is almost over and I cant wait for Navratri to begin...garba, dandya raas and awesome food. This is the my most favorite time of the year when festivals are being celebrated in India with so much energy and excitement.
I have got so engrossed in festivities that I just tend to ignore my work and work commitments and projects tend to near completion slowly and sometimes I just give myself due dates just to tell me to complete it. So today, I am posting a project on which I have been working on for almost 2 months......on and off. Because it was not on order, so I had the luxury to sideline it when I had other things or rush orders on my mind. I decided I had to give myself an ultimatum to take this project seriously......with so much festivities......I am like a child and get so engrossed.....I forget everything.....and I finally completed it on 2nd September....HIGH FIVE......
I got busy with Ganeshotsav and finally got sometime today to write a post about this beautiful project I have made for my friend. It was supposed to be her Belated Birthday gift......Well I am not so delayed after all....Just a delay of 2 months....lol. My BFF is a stationary hoarder and I feel if I rob her, my entire future generation can go without spending anything on stationary items....She has so many pencils, pens, erasers, colors, crayons, diaries and other stuff.....I am sure she doesn't even have a count of it and one day when I asked her to show me her hoarded gold......she had stuffed them in plastic bags and kept them someplace she couldn't locate. That is when I decided, she needed a treasure chest to store her stuff and I started making one for her from scratch.
So, this treasure chest is not a small sized box.....its a 3 layered box which has lot of space....but I am sure not enough for her collection.....but I am sure it will be of some use to her. I have built this box from scratch.....It took me 2 days to figure out what I wanted to do and how I wanted it to be. I designed it myself....make some mistakes on the way and it helped me to build it better.
This box measures 17" x 12" x 14" ( length x breadth x height) in dimensions. I have used sunboard and 1500 gms paper board which I have bought from Anupam Stationary stores. to make the box. The entire outer box is made using a sandwich of sunboard ans card board to obtain more durability and strength to the box. To make the inner partitions and flaps as well as small boxes and the other flap to attach the lock is made using the card board. The total weight of this box without anything inside it is 4 kgs.
FIRST LAYER/SHELF
I have used red tacky tapes, white adhesive and silicon glue for all purposes for this box. Handmade paper is used to cover the box on the inside as well as outside. pattern paper from Eno greetings is used to add some decoration and to cover the boxes. I have done some stamping on this box as well...used Fiskars stamp to add more pattern and borders to this box. Stenciling is done using distress inks in watnut stain, vintage photo, hickory smoke, black soot, old paper and antique linen. I have used same colors on the top and bottom but to obtain a different appearance, I gave the lower part of box a coat of white gesso, and then stenciled over it. That is how the colors look different.
SECOND LAYER/SHELF
To embellish the box, I made some corners from black chipboard and gave it a coat of glossy accents to make it look shiny. Did some decoration with black satin ribbon, polka dotted paper tape and Brown gingham pattern paper tapes. Those little golden flowers were in my stash and i have used them to add more interest to the chest.
THIRD LAYER/SHELF
I have used chipboard letters and colored them using black pigment ink pad and then added a layer of glossy accents on it. To add more interest to it, I added some micro beads on them in bronze and golden color and mounted them on layers of black and white handmade paper. These were then mounted on the box using foam tape. More chunky glitter in black and silver is added to the box using some liquid adhesive.
I have filled this box is some gift from my side which include handmade diaries, decoupaged pencils and more things which are only for my BFF's eyes and ears......can't disclose. This chest has 4 hinges and 3 latches added to it as well as some brads to embellish the name board. All the latches and hinges are held by little screws.
The supplies used for this project are:
3 Full emperial sheet of card board (1500gsm) - Anupam stationary store
2 full emperial sheet of sunboard- anupam stationary store
4 Black full emperial handmade paper (Itsy Bitsy)
2 White full emperial handmade paper (Itsy Bitsy)
2 Beige full emperial handmade paper (Itsy Bitsy)
Chipboard sheets to make the boxes inside ( optional)
Eno Greetings Pattern Paper ( The craft shop)
3 latches and hinges ( A1 craft store)
Glossy accents (A1 craft store)
Gingham and polka dotted paper tapes (Anupam stationary store)
Micro beads, chunky glitter ( Itsy Bitsy)
Brads ( Neha Koradia)
Read tacky tape
Fevicol
Aleene's tacky glue
Foam tape
Black satin ribbon ( Iitsy Bitsy)
Black chipboard for making corners
Mdf butterfly buttons (A1 cratft)
Fiskars stamps
Distress inks and ink blending tool- Watnut stain, Vintage photo, Old paper, Antique linen, Hickory smoke, Black soot.
Stencil ( Itsy Bitsy)
Decoupage papr and glue for pencils ( optional)
Diaries ( optional)
Silicon Glue/ Glue gun ( Itsy Bitsy)
Golden ribbon
Eyelets (ItsyBitsy)
Other papers( personal stash)
I even have a video to show the entire chest on youtube and I have added the link below for you all to see.
I am linking my project for this month's challenge at Ranganjali- Sparkly and shiny. I have added gold and bronze micro beads as well as some glitter and some golden shiny embellishments
It has been a long post and very picture heavy....I hope you all liked it and please do leave comments if you do. Thank you all for reading my post and I hope you all have a good day.
Hey guys
I am back with another project today. Since it all about friends this month, I have made a friendship explosion box. This one was for a client and a very quick make, I did steal a few pictures before dispatch. It requires very few supplies and I will give you a tutorial to make this one.
Supplies:
Cardstock
Pattern papers ( Papericious and Itsybitsy)
Embellishments
Scissors and trimmers
Adhesive
Scoring board and bone folder
Procedure:
I have made a 3"by 3"by 3"box. So start with a 9"by 9" heavyweignt cardstock. Score at 3"and 6". Then rotate the paper 90 degrees. Then score again at 3"and 6".
Once done, bend then at all the score marks. Cut as shown in the image below.
Since this is a single layer box, I did not add more layers to it and out work is done for inside layering.
To make the lid, use a 6.1"by 6.1"paper. Score at 1.5"and 4.6". Rotate the paper by 90 degrees and score again at 1.5"and 4.6".
Once done, bend and cut as shown in the image below.
To add the small inner box, Repeat the procedure above but instead of 9"by 9" paper, start with 6"by 6"paper. Score at 2"and 4"and rotate by 90 degrees and score at 2"and 4". Once done, cut as shown in image to obtain the shape of box.
For the lid, start with 4.1"by 4.1"paper. Score at 1"and 3.1"and rotate by 90 degrees and score at 1"and 3.1"'.
Once everything is ready, decorate it with your favorite pattern papers and embellishments and then assemble the box. I suggest so that you can apply good fore to adhere your paper and burnish your tapes. You cant exert much force after the box is assembled.
I have used pattern papers from Itsybitsy and Papericious. I have also added 3 photomats into the pockets. I have stamped on the photomats using Memento Tuxedo Black and Peek-a-boo stamp for photographs.
I have also written few quotes from the internet about friendship and printed them on white cardstock. I did so because the stamps which I have were too big for the explosion box I made.
Once everything was embellished and ready, I went ahead and joined the boxes and lids. Finished the box with mulberry flowers, rhinestones, pearls, ribbon and Mdf cutout stamped with the sentiment. The stamp is from Fiskars petals from scratch stamp set.
Thats the tutorial for this little explosion box. You can decorate it the way you like with your choice of papers and embellishments. Thank you all for reading my post and have a great day.
I am going to put up my project at the monthly challenge at Papericious which has a moodboard with different items that inspire you. I was inspired by the ribbon, diecut, flowers and little microbeads. I have tried to incorporate those in my own way.

 What she is is doing is collecting cards from willing people and send it to Leh, Hall of Fame and I feel she is doing an amazing job. I feel we should all support this cause and add as many cards as we can to this.Its a wonderful gesture and I wanted to participate in this. So made a few encouragement cards and Diwali cards myself.
 Since, using embellishments was required to be minimum and glitter or sequins was not advised, I used buttons in my cards with some paper twine in my cards. I started with standard A2 size card and used pattern paper which has gold motifs on them. Layered this pattern paper on some gold cardstock and mounted them on my card base. To add some decoration, I wound some paper twine and finished with a button and a bow.
 On the inside, the cards is pretty simple. I added a strip of pattern paper on the side to bring in some color. For dark cardbases, I have added white cardstocks on the inside to enable the use of any inks available with our jawans.
 The envelopes are simple ones made with the same color as the card base and and matching pattern paper. The happy diwali stamp is actually a combined stamp. Diwali is from Peek-a-boo stamp and Happy is from Fiskars petals from Scratch stamp set. The stamping is done using Black Archival ink so its permanent and waterproof.
 That's all from me.....and I hope all of you can add some cards from your side. Those of you who do not have a stamp or inks.....don't hold back. Use waterproof pens to write messages and sentiments....use anything you have to make cards. We should appreciate our soldiers who are fighting for us on the border...and these little encouragement notes and cards will mean a lot to them.