Showing posts with label diecuts. Show all posts

Saturday, 2 December 2017

Baby Announement/ Baby shower money envelopes

Hello guys
Today I am going to share one of my recent custom orders with you. I have made 100 of these envelopes for a dear client for her baby announcement function.....since the gender was not known, I made pink and blue envelopes. these were super fun to make but a little time consuming as well.
These envelopes are 7"by 3.5"in size and can fit a Rs 2000 not comfortably inside the pocket and the pocket is 1.5" in breadth.


So I have used Fabriano Elle Erre cardstock in Celeste and Rosa as the base of my envelopes. For the front panel and inside pocket of the envelope, I have used white cardstock
(250gsm from ItsyBitsy) which I have dry embossed with ItsyBitsy embossing folder and then highlighted it with Distress inks in Spun Sugar and Tumbled Glass also from the store.


To decorate the front of the envelope, I have added a strip of Fabriano cardstock in Fucsia and Azzurro and and layers of diecuts ( Spellbinder and sizzix) and finished it with wooden baby embellishments. I finished it with some butterfly diecuts from Memory Box and MFT flourishes.
I have given ribbon closure for the envelope (satin ribbons in solid and polka dotted).
That's all from me today....Thank you for stopping by. Hope you have a great week ahead.

Thursday, 10 August 2017

Best Wishes - Tri Fold Money envelope/ Card -3

Hey guys
How are you all doing? Here I have a money envelope again for you all which is perfect for any occasion. I have a Best Wishes sentiment which is very generic and can be used for weddings, festivals or any other occasion. This is the third design in this line and I have a few more to share with you all.
In size while the envelope/card is 7" by 3.5" in size and is a 3 fold envelope. There is a small pocket to hold the money and the center part is empty to add our message. The top part is left empty and we can keep it that way or add a nice poem or some stamping depending on the occasion. Here are some close up shots of the envelope.
I am putting this project at the following blog challenges:

  • ScrapyLand challenge#71 - Anything Goes - I have used Elizabeth Craft Designs die.
  • DLART August Linky challenge - Anything Goes
  • Scrapping 4 fun challenge#96- Lace/ Ribbons
  • HLS August Anything goes with a Die challenge
  • Inky chicks challenge#86 - use a sentiment instead of an image.

  • Supplies used:
    1. Ranger White heat embossing powder
    2. Ranger Superfine black heat embossing powder
    3. Wow heat embossing gun  (ItsyBitsy)
    4. Versamark watermark inkpad
    5. Beige cardstcock 250gsm (ItsyBitsy)
    6. L'amour Paper pack (ItsyBitsy)
    7. Chipboard elements - Round Ornate Frame (ItsyBitsy) 
    8. White sakura flowers - The Craft Studio
    9. Tim holtz Distressing Tool
    10. Rose Buds - Adornos
    11. Small Roses - The Craft Studio
    12. Big open roses - Itsybitsy
    13. Sentiment - Geometric Nature stamp set - Mudra craft stamps
    14. Elizabeth Craft Design Curvy Leaves Die
    15. Silicon Glue (ItsyBitsy)
    16. White Adhesive
    17. White 1" Satin ribbon (ItsyBitsy)
    18. Cheesecloth

    Thursday, 3 August 2017

    Best Wishes- Tri Fold Money Envelope/ Card -2

    Hey guys
    How are you all doing? Here I have a money envelope again for you all which is perfect for any occasion. I have a Best Wishes sentiment which is very generic and can be used for weddings, festivals or any other occasion. This is the second design in this line and I have a few more to share with you all.
    I am putting this project up at
    1. ScrapyLand challenge#71 - Anything Goes - I have used Elizabeth Craft Designs die.
    2. Allsorts of challenge blog - Week 426 - Photo Inspiration - The colors and flowers in the pic have been an inspiration for the color scheme for my envelope.
    3. DLART August Linky challenge - Anything Goes
    4. Inkychicks Challenge #86 - Use sentiment instead of an image.
    5. WordArtWednesday Week # 294 - 295 - Anything Goes
    6. Modsquadchallengeblog - The Wing's The Thing - I have Butterfly as my focal point.

    In size while the envelope/card is 7" by 3.5" in size and is a 3 fold envelope. There is a small pocket to hold the money and the center part is empty to add our message. The top part is left empty and we can keep it that way or add a nice poem or some stamping depending on the occasion. Here are some close up shots of the envelope.
    Supplies used:
    1. Ranger White heat embossing powder
    2. Ranger Tinsel Gold heat embossing powder
    3. Wow heat embossing gun  (ItsyBitsy)
    4. Versamark watermark inkpad
    5. Red cardstcock 250gsm (ItsyBitsy)
    6. Daisies - Jasmine Siddhiqui
    7. L'amour Paper pack (ItsyBitsy)
    8. Chipboard elements - Garden Butterfly (ItsyBitsy) 
    9. White sakure flowers - The Craft Studio
    10. Tim holtz Distressing Tool
    11. Rose Buds - Adornos
    12. Sentiment - Geometric Nature stamp set - Mudra craft stamps
    13. Elizabeth Craft Design Curvy Leaves Die
    14. Silicon Glue (ItsyBitsy)
    15. White Adhesive
    16. White 1" Satin ribbon (ItsyBitsy)

    Monday, 31 July 2017

    Best Wishes- Money Envelope -1

    Hello everyone
    How are you all doing? I was on a small vacation from 27th to 30th to celebrate my Birthday.....fully energized and now back to work. So, here I have a money envelope for you all which is perfect for any occasion. I have a Best Wishes sentiment which is very generic and can be used for weddings, festivals or any other occasion.
    In size while the envelope is 7" by 3.5" in size and is a 3 fold envelope. There is a small pocket to hold the money and the center part is empty to add our message. The top part is left empty and we can keep it that way or add a nice poem or some stamping. Here are some close up shots of the envelope.
    Supplies used:
    1. Ranger White heat embossing powder
    2. Ranger Tinsel Gold heat embossing powder
    3. Wow heat embossing gun  (ItsyBitsy)
    4. Versamark watermark inkpad
    5. Ash grey cardstcock 250gsm (ItsyBitsy)
    6. Wils open roses - yellow - Itsybitsy
    7. L'amour Paper pack (ItsyBitsy)
    8. Chipboard elements - Scroll Borders (ItsyBitsy) 
    9. Cheesecloth
    10. Tim holtz Distressing Tool
    11. Blue white rose - Personal stash
    12. Rose Buds - Adornos
    13. Small Blue roses - ItsyBitsy
    14. Sentiment - Geometric Nature stamp set - Mudra craft stamps
    15. Elizabeth Craft Design Curvy Leaves Die
    16. Silicon Glue (ItsyBitsy)
    17. White Adhesive
    18. White 1" Satin ribbon (ItsyBitsy)
    Thank you for reading this post. Have a nice day.

    Wednesday, 12 July 2017

    Happy Rakshabandan - Shabby Chic Money Envelope and Gift Box (Pink)

    Hello everyone
    How are you all today? I hope you all are having a fab week. So I have yet another Gift box with a matching Envelope for the upcoming festival Raksha Bandhan. This is the second one I have made and its similar to the first one with the only difference being the color of the project.  

    Importance of Raksha Bandhan

    Raksha Bandhan is a Hindu secular festival which is a celebration of sibling love and to be very specific Brother- Sister bond. Raksha Bandhan in Sanskrit literally means "the tie or knot of protection". The word Raksha means protection, while Bandhan is the verb to tie. On this day, The sister comes to Brother’s house and ties a sacred thread (Rakhi or an amulet)on this wrist in turn seeking protection from all evil for a lifetime. This is followed with a prayer or a song while putting red vermillion dot (Tilak) on his forehead and performing Aarti . An aarti is nothing but  a tray with lighted lamp which ritually rotated  clockwise around the brother's face, along with the prayer and well wishes.She then feeds him sweets which traditionally are ladoos, barfis and pedas (Indian Sweets)and in the recent times we feed them Chocolates and sometimes even diet sweets….lol. In return, along with the promise to protect her all her life, the brother also gives her gifts and money.

    My husband has 2 sisters (1st cousins) and they would be coming over for Raksha Bandhan to my house and for them I have made this money envelope and a gift box to add a small gift and some money.


    The box is 5" by 5" by 3" in size while the envelope is 7" by 3.5" in size and is a 3 fold envelope. The is a belly band to hold the money and the center part is empty to add our message. The top part is left empty and we can keep it that way or add a nice poem or some stamping. Here are some close up shots of the envelope.

    I am putting this project up at
    1. Addicted to Stamps and more challenge#250 - Photo Inspiration (Got inspired by the colors in this photo)
    Supplies used:
    1. Ranger White heat embossing powder
    2. Wow heat embossing gun  (ItsyBitsy)
    3. Versamark watermark inkpad
    4. Pink cardstcock 250gsm (ItsyBitsy)
    5. Green cardstcock 250gsm (ItsyBitsy)
    6. J'ardin Paper pack (ItsyBitsy)
    7. Chipboard elements (ItsyBitsy) 
    8. Tsukineko Radiant Neon Pigment Ink Pad Quad Warm
    9. Kraft cardstock 270gsm  (ItsyBitsy)
    10. Sequins - Sugar Plum Mix and Yellow (Mudra)
    11. Small roses (1cm) - Nikita More
    12. Violet flower - ItsyBitsy
    13. Rose Buds - Nikita More
    14. White Sakura flowers - Nikita More
    15. Sugar Pollen - ItsyBitsy
    16. Rakshabandhan stamp - Peek a boo designs - Happy stamp set
    17. Happy stamp - Petals From Scratch Card Sentiments Clear Acrylic Stamp Set by Fiskars Stamps
    18. Elizabeth Craft Design Curvy Leaves Die
    19. Silicon Glue (ItsyBitsy)
    20. White Adhesive
    21. White 1" Satin ribbon (ItsyBitsy)
    22. Pink roses (ItsyBitsy)

    Sunday, 9 July 2017

    Happy Rakshabandan - Shabby Chic Money Envelope and Gift Box.

    Hello everyone
    I hope you all are having a fab week. I have a new project to share with you all today and it’s the first time I have made something like this.  Here I have Money Envelope with a Gift Box which I have made for the upcoming Indian festival Raksha Bandhan. 

    Importance of Raksha Bandhan
    Raksha Bandhan is a Hindu secular festival which is a celebration of sibling love and to be very specific Brother- Sister bond. Raksha Bandhan in Sanskrit literally means "the tie or knot of protection". The word Raksha means protection, while Bandhan is the verb to tie. On this day, The sister comes to Brother’s house and ties a sacred thread (Rakhi or an amulet)on this wrist in turn seeking protection from all evil for a lifetime. This is followed with a prayer or a song while putting red vermillion dot (Tilak) on his forehead and performing Aarti . An aarti is nothing but  a tray with lighted lamp which ritually rotated  clockwise around the brother's face, along with the prayer and well wishes.She then feeds him sweets which traditionally are ladoos, barfis and pedas (Indian Sweets)and in the recent times we feed them Chocolates and sometimes even diet sweets….lol. In return, along with the promise to protect her all her life, the brother also gives her gifts and money.

    My husband has 2 sisters (1st cousins) and they would be coming over for Raksha Bandhan to my house and for them I have made this money envelope and a gift box to add a small gift and some money.

    The box is 5" by 5" by 3" in size while the envelope is 7" by 3.5" in size and is a 3 fold envelope. The is a belly band to hold the money and the center part is empty to add our message. The top part is left empty and we can keep it that way or add a nice poem or some stamping. Here are some close up shots of the envelope.
    I am putting this project up at
    1. Craft stamper magazine - Take it Make it July
    2. CWS Challenge #16 - Celebrate  (I have made a this project to celebrate Indian festival RakshaBandhan. )
    3. HLS - Anything goes with Dies - July 2017 (I have incorporated leaf dies in my project )
    4. Polkadoodles Crafting Challenge Week 27 - Anything Goes
    5. Scrapy Land Challenge #69 - Anything Goes (I have used Elizabeth Craft Design Curvy Leaves Die)
    6. Word Art Wednesday Week #290-291 - Anything Goes


    Supplies used:
    1. Ranger White heat embossing powder
    2. Wow heat embossing gun  (ItsyBitsy)
    3. Versamark watermark inkpad
    4. Violet cardstcock 250gsm (ItsyBitsy)
    5. Green cardstcock 250gsm (ItsyBitsy)
    6. J'ardin Paper pack (ItsyBitsy)
    7. Chipboard elements (ItsyBitsy) 
    8. Memento Grape Jelly dye ink
    9. White cardstock 270gsm  (ItsyBitsy)
    10. Sequins - Sugar Plum Mix and Yellow (Mudra)
    11. Small roses (1cm) - Nikita More
    12. Brown Poppies - Crafter's Corner
    13. Rose Buds - Nikita More
    14. White Sakura flowers - Nikita More
    15. Sugar Pollen - ItsyBitsy
    16. Rakshabandhan stamp - Peek a boo designs - Happy stamp set
    17. Happy stamp - Petals From Scratch Card Sentiments Clear Acrylic Stamp Set by Fiskars Stamps
    18. Elizabeth Craft Design Curvy Leaves Die
    19. Silicon Glue (ItsyBitsy)
    20. White Adhesive
    21. Violet 1" Satin ribbon (ItsyBitsy)
    22. Yellow roses (ItsyBitsy)

    Tuesday, 16 May 2017

    Beautiful 50 Gift box using ItsyBitsy Forever and Always paper pack - GDT post for ItsyBitsy

    Hey guys
    I have a new project to share with you all on ItsyBitsy blog where I am doing a guest DT post. Please hop along by click the link below and meet me there to know more about this beautiful gift box.
    http://itsybitsyindia.blogspot.in/2017/05/beautiful-50-giftbox-using-forever-and.html
    More pictures and list of supplies and tons of information awaits you at

    I am putting this project up at
    1 Craft Addiction Design team and challenge#5- Anything  but square
    The Ribbon Girl May Challenge
    3 Craftsneed Challenge May Challenge
    4 Allsorts challenge blog - Ring-a-ring O Roses
    5 Scrapping4fun challenge #90- Ladies
    6 ScrapBox - May Challenge - Chipboard + Gold
    Thank you and have a fab day ahead.....

    Sunday, 9 April 2017

    Happy Easter Handmade card

    Hello everyone
    I am back with a handmade card today and after really long. I haven't made any cards in the last few months and so I am really excited to share this one with you all. Since Easter is on the horizon, I have made a shabby chic Easter card.
    I am putting my card up at monthly competitions at:-
    1 Addicted to stamps challenge#236
    2 Allsorts challenge Blog Week 410 - Bring on the bling
    14 Scrappy Land Challenge #63- Used die from Elizabeth Craft Design

    I have used a lot of products to make this one and am simply in love with the result. The papers used for the card are from Eno Greetings and Papericious. I have done a little stenciling using a very pretty Roses stencil from Prima Marketing. The egg is fussy but by me since I didn't have a die for it. The stamp used for the sentiment is partly from a local store while the EASTER is handwritten using a finetip waterproof Black pen.
    I added some delicate leaves using Elizabeth craft designs die and some mulberry flowers which are from different stores. The laces and trims are from local store and Itsybitsy. I did dry brush some Art Basics Heavy white gesso on some flowers and other places.
     I have distressed the edges and added some sparkle using clear sparkle powder from Crafters corner. I have also used Wink of stella at some places. The little gold bird is from Papericious chippies and is heat embossed using Tinsel Gold from Ranger.Finally, I finished the card by added few  sequins and splatters of gold and white acrylic paints.
    List of Supplies:-
    1 White cardstock - Itsybitsy
    2 shades of green cardstock - Itsybitsy
    3 Pattern paper for background - Eno Greetings
    4 Pattern paper for Egg - Papericious Flora Season
    5 Roses Stencil - Prima Marketing
    6 Pink color splash - Itsybitsy- To add Pink tinge to the texture paste used for stenciling
    7 Embossing/ Texture paste - Art Basics Prima Marketing
    8 White Gesso - Art Basics - Prima Marketing
    9 White fun foam to add dimensions - Local Store
    10 Leaves die - Elizabeth Craft Designs
    11 Mulberry flowers - Crafters corner, The Craftshop, Local stores
    12 Jute twine - Itsybitsy
    13 Laces and trims - Local store and Itsybitsy
    14 Clear sequins - Crafters corner
    15 Gold sequins- Itsybitsy
    16 Silicon glue - Itsybitsy
    17 Clear Sparkle dust - Crafters corner
    18 Wink of stella - Crafters corner
    19 Tim Holtz Distressing tool- Crafters corner
    20 Bird Chippies - Papericious
    21 Versamark - Crafters corner
    22 Tinsel Gold - Crafters corner
    23 Wow Heat gun - Itsybitsy
    24 White and gold acrylic paints

    I hope you liked my card. Thank you so much for visiting me.

    Sunday, 12 March 2017

    Happy 50th Birthday Album featuring Papericious Pretty Basics pattern paper (For a Lady)

    Hello guys
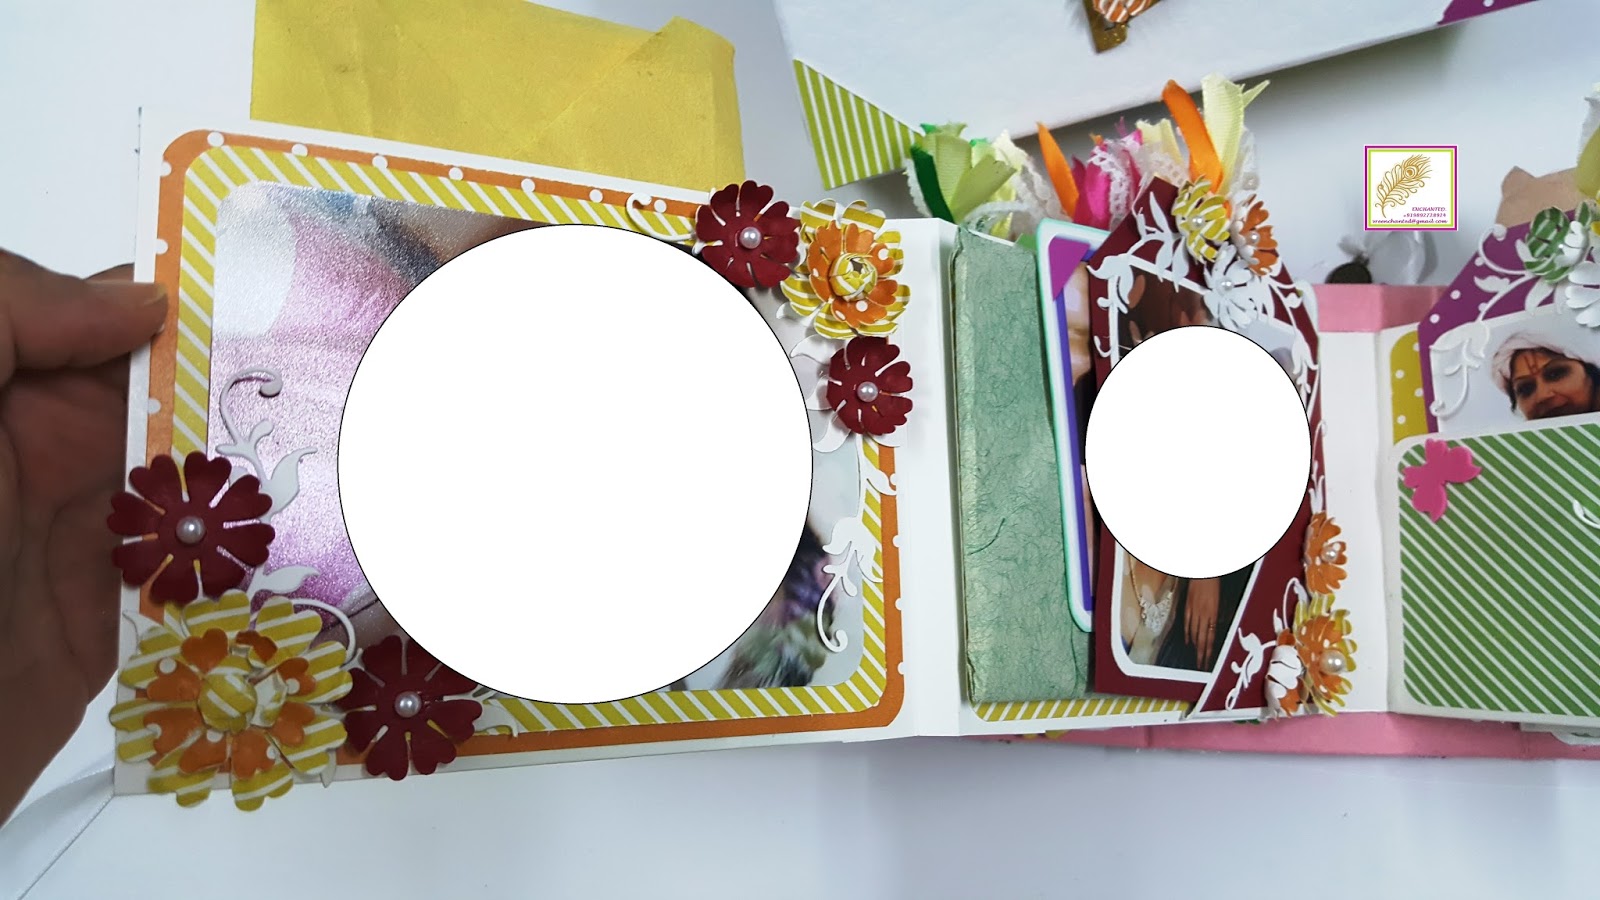
    I have been a little caught up with work lately and haven't been able to blog as much as I would have liked. I apologize for the same and hope to post more often. So here is a new project I did which is a 6"x 8"Mini Album with a box and 9 specific tags which are placed in the box. The album holds around 40 pics and 12 tags in 5 interactive pages. This album holds few 5"x 7"pics and 4"by 4"pics while most of the pics are 6" by 4"in size. This album was made to celebrate 50th Birthday of a very special lady and was gifted to her by her daughter. Since it has many pictures on the pages, I have chosen to hide them.
    I am putting up this project for Monthly challenge at
    1  Papericious - Birthday Wishes
    2  Allsorts of blog challenge and their theme is Ladies and Girls.
    3 The Ribbon Girl - Anything Goes

    The spine is 4 3/4"and the covers are 6"by 8". The pages are 5"by 7"in size and have lots of pockets and flipouts. The box is 9"by 6" by 6"in size and has a partition to hold all the extra tags.I have used Papericious Pretty Basics pattern paper for this project along with few solid colored cardstock from Itsybitsy. To build the album I have used white 230gsm Iris Paper and for the box I have used White handmade paper from Itsybitsy. The inside of the box and the album cover is covered with Pink hand made paper again from Itsybitsy.

    I have made all the flowers used inside this album using sizzix bigshot and flower dies. I have made around 120 to 150 flowers for the album from the same paper used to make the album and cover. The only exception to this is the flowers on the album cover which are bought from Itsybitsy. The youthful word is chipboard diecut which are covered with the patterm paper and fussy cut. The no 50 is Mdf diecut bought from a local store. All the perals used on ethe cover as well as flower centers are from Itsybitsy. The florishes are  cut using MFT die and my Bigshot machine. All in all I have cut around 120 to 150 florishes for this album.

    All the photomats are given color on the edge using Memento dye inks. The spine has laces which are bought from a local fabric store. All the ribbons used are from Itsybitsy and the charms are from A1 craft. There are a few envelopes tucked inside this album to make space for letters. These envelopes are made from handmade tissue paper.

    Top View
    Spine
    Back cover
    Please grab a cup of coffee and sit patiently as there are more pics to come and these pics are of the 5 interactive pages and the inside covers. I have you all like it.

    Inside cover

    Page 1


    Page 2
      

    Page 3


    Page 4


    Page 5 and Back cover

    I have a video at the end and I hope you will watch it. 

    Thank you for reading my post and watching this video. I hope you all liked it. Till next time..Keep crafting.