Sunday, 12 March 2017

Happy 50th Birthday Album featuring Papericious Pretty Basics pattern paper (For a Lady)

Hello guys
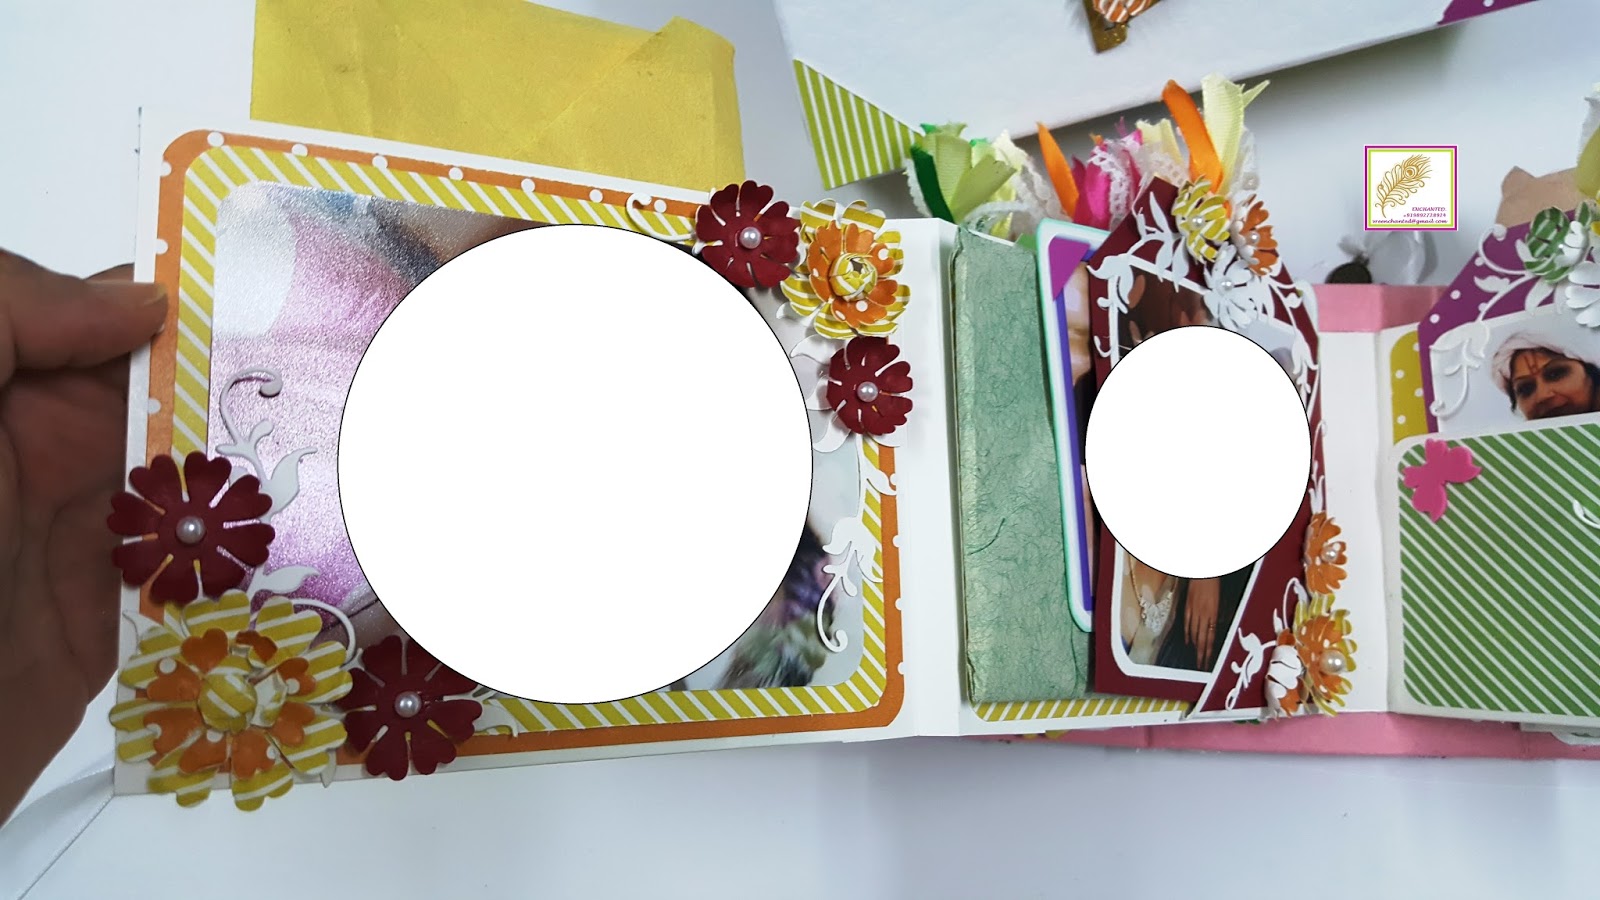
I have been a little caught up with work lately and haven't been able to blog as much as I would have liked. I apologize for the same and hope to post more often. So here is a new project I did which is a 6"x 8"Mini Album with a box and 9 specific tags which are placed in the box. The album holds around 40 pics and 12 tags in 5 interactive pages. This album holds few 5"x 7"pics and 4"by 4"pics while most of the pics are 6" by 4"in size. This album was made to celebrate 50th Birthday of a very special lady and was gifted to her by her daughter. Since it has many pictures on the pages, I have chosen to hide them.
I am putting up this project for Monthly challenge at
1  Papericious - Birthday Wishes
2  Allsorts of blog challenge and their theme is Ladies and Girls.
3 The Ribbon Girl - Anything Goes

The spine is 4 3/4"and the covers are 6"by 8". The pages are 5"by 7"in size and have lots of pockets and flipouts. The box is 9"by 6" by 6"in size and has a partition to hold all the extra tags.I have used Papericious Pretty Basics pattern paper for this project along with few solid colored cardstock from Itsybitsy. To build the album I have used white 230gsm Iris Paper and for the box I have used White handmade paper from Itsybitsy. The inside of the box and the album cover is covered with Pink hand made paper again from Itsybitsy.

I have made all the flowers used inside this album using sizzix bigshot and flower dies. I have made around 120 to 150 flowers for the album from the same paper used to make the album and cover. The only exception to this is the flowers on the album cover which are bought from Itsybitsy. The youthful word is chipboard diecut which are covered with the patterm paper and fussy cut. The no 50 is Mdf diecut bought from a local store. All the perals used on ethe cover as well as flower centers are from Itsybitsy. The florishes are  cut using MFT die and my Bigshot machine. All in all I have cut around 120 to 150 florishes for this album.

All the photomats are given color on the edge using Memento dye inks. The spine has laces which are bought from a local fabric store. All the ribbons used are from Itsybitsy and the charms are from A1 craft. There are a few envelopes tucked inside this album to make space for letters. These envelopes are made from handmade tissue paper.

Top View
Spine
Back cover
Please grab a cup of coffee and sit patiently as there are more pics to come and these pics are of the 5 interactive pages and the inside covers. I have you all like it.

Inside cover

Page 1


Page 2
  

Page 3


Page 4


Page 5 and Back cover

I have a video at the end and I hope you will watch it. 

Thank you for reading my post and watching this video. I hope you all liked it. Till next time..Keep crafting.

Wednesday, 15 February 2017

Be Mine - Handmade card using ItsyBitsy dies.

Hello guys
I am back today with a new shaker card. Shaker cards have always been my favorite and are super fun to make. I have made this one keep Valentine's Day in mind and this one I have made for my husband. I truly hope he likes this one..
I am putting this card up at :-
1 Itsybitsy Challenge#2 2017 - Being creative with thin cut dies.
2 Addicted to stamps challenge #229 - Clean and simple
3 Allsorts challeneg #402  - Hearts and/or Flowers
4 Cards and more challenge # 178 -Valentine's Day

5 Craft stamper February challenge - Take it and make it.
6 CWS Challenge #11 - Valentine
7 Let's Craft & Create Challenge #122- Love is in the air
8 Petal Lu Challenge #32 - Anything goes
9 Paru's Card making Challenge - Love
10 Scrapping 4 fun challenge #83 - Friends, Wedding, love, Valentine
11 The Ribbon Girl February Challenge - Anything goes

So to begin, I started with a 4 1/4" by 51/2" standard A2 size card for the base. I have used white cardstock from Itsybitsy. They had sent me this in a free haul some time back.I had used it earlier to make some tags and this time I used it to make a card. i must say that the quality is really good.
I cut the 3 hearts  on a 41/4" by 51/2" white cardstock piece using ItsyBitsy nesting hearts dies through my Sizzix Bigshot. The die set has 4 hearts and I have used the smaller 3 dies.
I added a little red hearts confetti sequins, clear white sequins and some gold sequins as my shaker elements.
I have used some foam adhesive and clear acetate sheet to create my shaker window. Once my shaker card was ready, I added some splatters using Memento Ladybug dye ink o the card front. to add more details, I made some dots with my red gel pen.
Embellished my card using some clear sequins and 3 red die cut hearts right in the center of the shaker panels. The sentiment "Be Mine" is stamped on vellum using Tinsel Gold embossing powder by Ranger.
For the inside, I just matted the card using Red cardstock and layered some red and whte die cut hearts.
That finished my card....all I need to do is write a message and make a cute envelope for this card. Can't wait to hand it over to my husband when he comes home....
Thank you guys for reading this post and until next time....Keep Crafting.

Supplies used:
1 White cardstock (Itsybitsy)
2 Red Cardstock (Itsybitsy)
3 Range multi medium matte
4 Clear sequins(Local store)
5 Red confetti sequins (Local store)
6 Gold sequins (Itsybitsy)
7 Itsybitsy thin cut dies Heart 4 pcs (Itsybitsy)
8 Foam tape (Itsybitsy)
9 Acetate sheet (Itsybitsy)
10 Sizzix Bigshot (Itsybitsy)
11 Vellum (Itsybitsy)
12 Wow Heat Embossing gun (Itsybitsy)
13 Ranger Tinsel gold Embossing powder (A1 craft supply)
14 Be Mine Sentiment (Local store)

Thursday, 9 February 2017

Happy Valentine's Day - Handmade Gift Box

Hello guys
I am back with a new gift box today and it is Valentine's Day themed. I made this for my husband and I really hope he likes it. I am planning to fill it with some things he likes.......shhhhhhh...its a a secret.
This box is actually 9 1/4"x 5 1/4" on the outside and 8 1/4"x 4 1/4" on the inside and the thickness is 2". I have gone crazy with bling this time. The pattern paper used is from Eno Greetings from the blossom series and the papers are all gold foiled. So to match them I have used glitter paper and few glitter paper diecuts and a bottle of glittery sparkle dots......bling bling bling.
I am putting up my project at Let's Craft and Create challenge #122 , Petal Lu challenge #31, Simonsaysstamp- Young at heart, Try it on tuesday challenge- Hearts and Flowers (I have used both flowers and a gold heart in my project)and  Scrapping4fun challenge 83


So here is the list of supplies used for the box:
1 Chipboard (Kraftily Konnect)
2 Black heavyweight paper (Itsybitsy)
3 Gold glitter paper (Itsybitsy)
4 White satin ribbon (Itsybitsy)
5 Silicon glue (Itsybitsy)
6 Pearls (Itsybitsy)
Gold beads(local store)
8 Pattern paper - Eno greetings Paper series Blossom.
9 Glass bottle (Itsybitsy)
10 Sparkle dots (Itsybitsy) 
11 Foam adhesive
12 Flourish diecuts- MFT 
13 Red Cardstock (Kraftily Konnect)
14 Gold Embossed paper (local Store)
15 Rose buds and poppies (Crafters corner)
16 Open handmade flower (Itsybitsy)
17 Red Rose and satin rose (Local Store)
18 Butterfly, Gold heart and Valentine notecard from the paper pack
19 Sentiment tiles (Crafters corner)
20 Metal charm (Local store)

At the very end I have added the link for the video walkthrough of this project. If you want a tutorial for this box, please let me know and I will come up with one.

 I hope you all will liked my project...until next time..keep smiling.

Wednesday, 8 February 2017

Baby Girl Stroller Gift box

Hi guys.

   I have made a Gift box which looks like a baby stroller. You can pack gifts for the new born on baby shower, baby announcement or any occasion you can think of. Now earlier I had made one for a baby boy....this time its for a baby girl. this gift box is almost 18"in height and the dimensions is 14" x  8" approximately in length and breadth.
I am putting up my project at Craft stamper Magazine  and Petal Lu Challenge #31.
  For tutorial, you can visit my earlier post which is very elaborate Click on this link to go to Baby Stroller Gift Box for the tutorial. However if you guys want a video tutorial for the same, do let me know and I will be happy to do one for you.
This gift box took me 2 days approximately to complete as it is a big one and has tone of details to be added to it. I hope you all like it and would try to make a similar one at home.

Supplies used:
  1.  Mount-boards or Cardboard (3)
  2.  Scissors
  3.  Cutters with sharp blades
  4. Fevicol or white strong glue
  5. Fevibond or silicon glue
  6. Kangaroo 1 hole punch
  7. Crafting mat
  8. Ruler
  9.  Compass to draw circles
  10.  Pencils
  11. Small tip glue tube
  12. Binder clips or clothes pin
  13. Level meter
  14. Chart paper or any handmade paper for wheels ( big sheets in 3 colors of your choice I each. 110 gsm)
  15. Heavy Card-stock (220- 250 gsm )
  16. Embellishments
  17. Eyelets
  18. Eyelets punch
  19. Wooden or acrylic beads
  20. Satin ribbon
  21. Glitter foam sheet
  22. Kite paper or tissue paper
  23. Needle and thread
  24. Glitter paper flowers
  25. Pearls
  26. Rhinestone flowers
  27. Wooden beads
  28. Lace/ Trims
  29. Welcome stamp and Archival ink

To make the movable shutter, I have sewed the pieces of the strips to one another in such a fashion that they pieces do not get apart completely. All the pieces of the shutter are held together with a homemade brad.....its simple .....just use button with 2 holes and a thick wire. Pass the wire through the holes of the button and its ready to work like a brad. I covered the exposed end of the wires using a glitter flower with pearl on the center.


  The shutters are decorated with glitter flowers from Itsybitsy and Pink lace trim also from Itsybitsy. I punched a hole in the center of first shutter and added a pink eyelet to it. I then passed the same pink trip and added 3 wooden beads to it....this helps to add some weight on the shutter and keeps it stay put rather than sliding back.
  Finally, I decorate the edges and wheels with thin strips of pink glitter foam. Adds a little interest an color at the same time. The sentiment used is from Mudra stamps and I have heat embossed it using Ranger black embossing powder. Matted it and mounted it using some foam tape.
  This gift box has movable shutter and fixed wheels. You can add an handle to it if you want but I haven't added it purposefully to enable easy access to the gifts.
I am adding the youtube video link below to view the complete gift box. I hope you guys will like it.
Thank you for reading this post and I hope you all will like this.

Saturday, 4 February 2017

Tissue Paper Flowers

Hello everyone
I did a few projects last month and blogged about a few. Some my of my projects needed me to make few paper flowers. I have a tutorial for making these flowers. You can surely make more but variety but today I will show you how to make peonies.

Supplies:
  1. Crepe/ Duplex/ Tissue paper (Itsybitsy)
  2. String pollens/ wire pollens
  3. Green tape
  4. Floral wire
  5. Silicon glue (Itsybitsy) or any other strong glue
  6. Newspaper 
  7. Scissors
  8. Wire cutters (Itsybitsy)
  9. Liquid adhesive
  10. Glitter (Itsybitsy)
Procedure:      Peonies
  1. To make these flowers, we need a strong and secured center, coz these flowers are heavy and if you dunt use something sturdy to hold the flowers in the center, it will just fall apart, So to begin what I did was make a newspaper tube. You can take a small piece of newspaper and roll it until you dunt get a nice firm tube. 
  2. Through this tube, pass your floral wire and make a u hook at one end close to the tube. This will make for the center of the flower where our pollens will be held.
  3. Once you do this, take all the pollens you desire in the quantity you like and hold them together. I have used pale yellow and white wire pollens ( 1 bunch each) and 1 bunch of white string/wire pollen. Together I have arranged them in varying height and then keeping the u hook in center, folded these pollens over it. Then, I just added some silicon glue to it to make it stay bunches. Once it all got a bit dry, I then rolled my green tape over it to make a nice center for our flowers.
  4. Now to make the petals, I have used a combination of duplex, crepe and tissue paper. For a simple one, take white crepe paper sheets like you get in markets. Then divide it into 3 parts. hold them together and start folding them in a fan style. Cut the cents of the fan to give it a nice shape. You can cut in U, V or heart shape. I did a U.
  5. Then you can fold the fan and mark the center, turn the fan such that the edges face you and tie it up using some wire from the center of the flower we made to hold the pollens. Wrap it tightly and then open op your fan and start peeling the layers upwards. This is more like how we make pom pom balls, but here we do not peel the layers downwards.
  6. Once all the layers are peeled on both  the sides, the flower will be done. Turn the flower and add silicon glue to seal any gaps. Cut the extra wire if you want or let it be. If you want it to be left, then you cover it with green tape and add some leaves to it.
  7. I added some glitter to the flowers by dabbing some fevicol on the petals and then dipping it in gold glitter.
Our Peonies are ready. Use them to decorate your events and parties like baby showers, birthday parties, festival parties and more......simple and very effective. If you want a video tutorial for the same...please let me know and I will do one shortly.
Thank you for reading this post and I hope you found this useful. Have a great day guys.


Thursday, 2 February 2017

Handmade 50th Birthday Gift Box

Hey everyone
How are you all doing this week....I am back with a another new gift box...Ii have been making a lot of gift boxes lately and I really had some fun making them. Now this gift box is made to celebrate 50th birthday and is made keeping gold, black and white as color scheme. I really hope you guys will like this one...
I am putting this project up at Addicted to stamps challenge - Make your mark (I have used white gel pen to write on tags), Petal Lu  and Allsorts challenge - Lets celebrate.
This box is actually 9 1/4"x 5 1/4" on the outside and 8 1/4"x 4 1/4" on the inside and the thickness is 2". I have kept the embellishments to the minimum as the paper used is very decorative on its own. I have used handmade flowers, sparkle dots and few die cut flourishes to decorate this box.
The supplies used for this project are mentioned below.
 The little mustache is stamped with versamark using a foam stamp from itsybitsy and heat embossed with UTEE(Ultra thick embossing enamel) from ranger on a black cardstock. Then I just fussy cut is with little scissors and mounted it on the numbers using some strong adhesive.
The 3 little tags are handcut by me and the messages are handwritten with white gel pen. Holes were punched with a Kangaroo hole punch and then attached to the box using some white satin ribbon. I also used gold and white satin ribbonds as closure for the box.
 The Birthday Wishes sentiment is from Justrite Grande Handwritten Sentiments clear stamp set. I have heat embossed the sentiment using versamark and Gold embossing powder from Ranger on a black cardstock.
So here is the list of supplies used for the box:
1 Chipboard (Kraftily Konnect)
2 Black handmade paper (Itsybitsy)
3 Gold pearl paper ( A1 craft supply)
4 Gold satin ribbon (Itsybitsy)
5 White satin ribbon (Itsybitsy)
6 Silicon glue (Itsybitsy)
7 Pearls (Itsybitsy)
8 Pattern paper - Eno greetings Paper series Blossom.
9 Chipboard alphabets (Itsybitsy)
10 Sparkle dots (Itsybitsy) 
12 Flourish diecuts- MFT 
13 Versamark embossing pad and heat gun (Itsybitsy)
14 Gold embossing powder: Ranger (Crafters corner)
15 White adhesive - Fevicol
16 Handmade flowers- dies from sizzix.
17 White gel pen  local store
18 UTEE: Ranger (Crafters corner)
19 Mustache foam stamp (Itsybitsy) 
20 Birthday wishes - Justrite Grande Handwritten Sentiments clear stamp set
 At the very end I have added the link for the video walkthrough of this project. If you want a tutorial for this box, please let me know and I will come up with one. I hope you all will liked my project...until next time..keep smiling.